Enterprise RabbitMQ on Kubernetes! Modernizing Messaging!
🚀🐰📦 RabbitMQ workshop is designed to get hands on operational experience with Enterprise RabbitMQ on K8s. 🚀🐰📦

📦Prequisites📦
- K8s installed and running (Kind,Docker k8s, MiniKube, Any K8s)
- kubectl
- helm
🚀🐰📦 Labs 🚀🐰📦
- LAB 1: Installing Enterprise RabbitMQ Operators and RabbitMQ Cluster
- LAB 2: Creating Users and Permissions
- LAB 3: Accessing the ManagementUI
- LAB 4: Enabling Standby Replication - Enterprise Feature
- LAB 5: Creating a Queues and Publishing/Consuming Messages Via RMQPerf Test
- LAB 6: Shovel Plugin: Moving Messages
- LAB 7: Monitoring RabbitMQ with Prometheus
- LAB 8: Validating Distaster Recovery - Enterprise Feature
- LAB 9: Upgrading Enterprise RabbitMQ Operators and RabbitMQ Cluster
- LAB 10: Working with RabbitMQAdmin V2 CLI
- LAB 11: Disaster Recovery - Enterprise Feature
- LAB 12: Scaling RabbitMQ on k8s
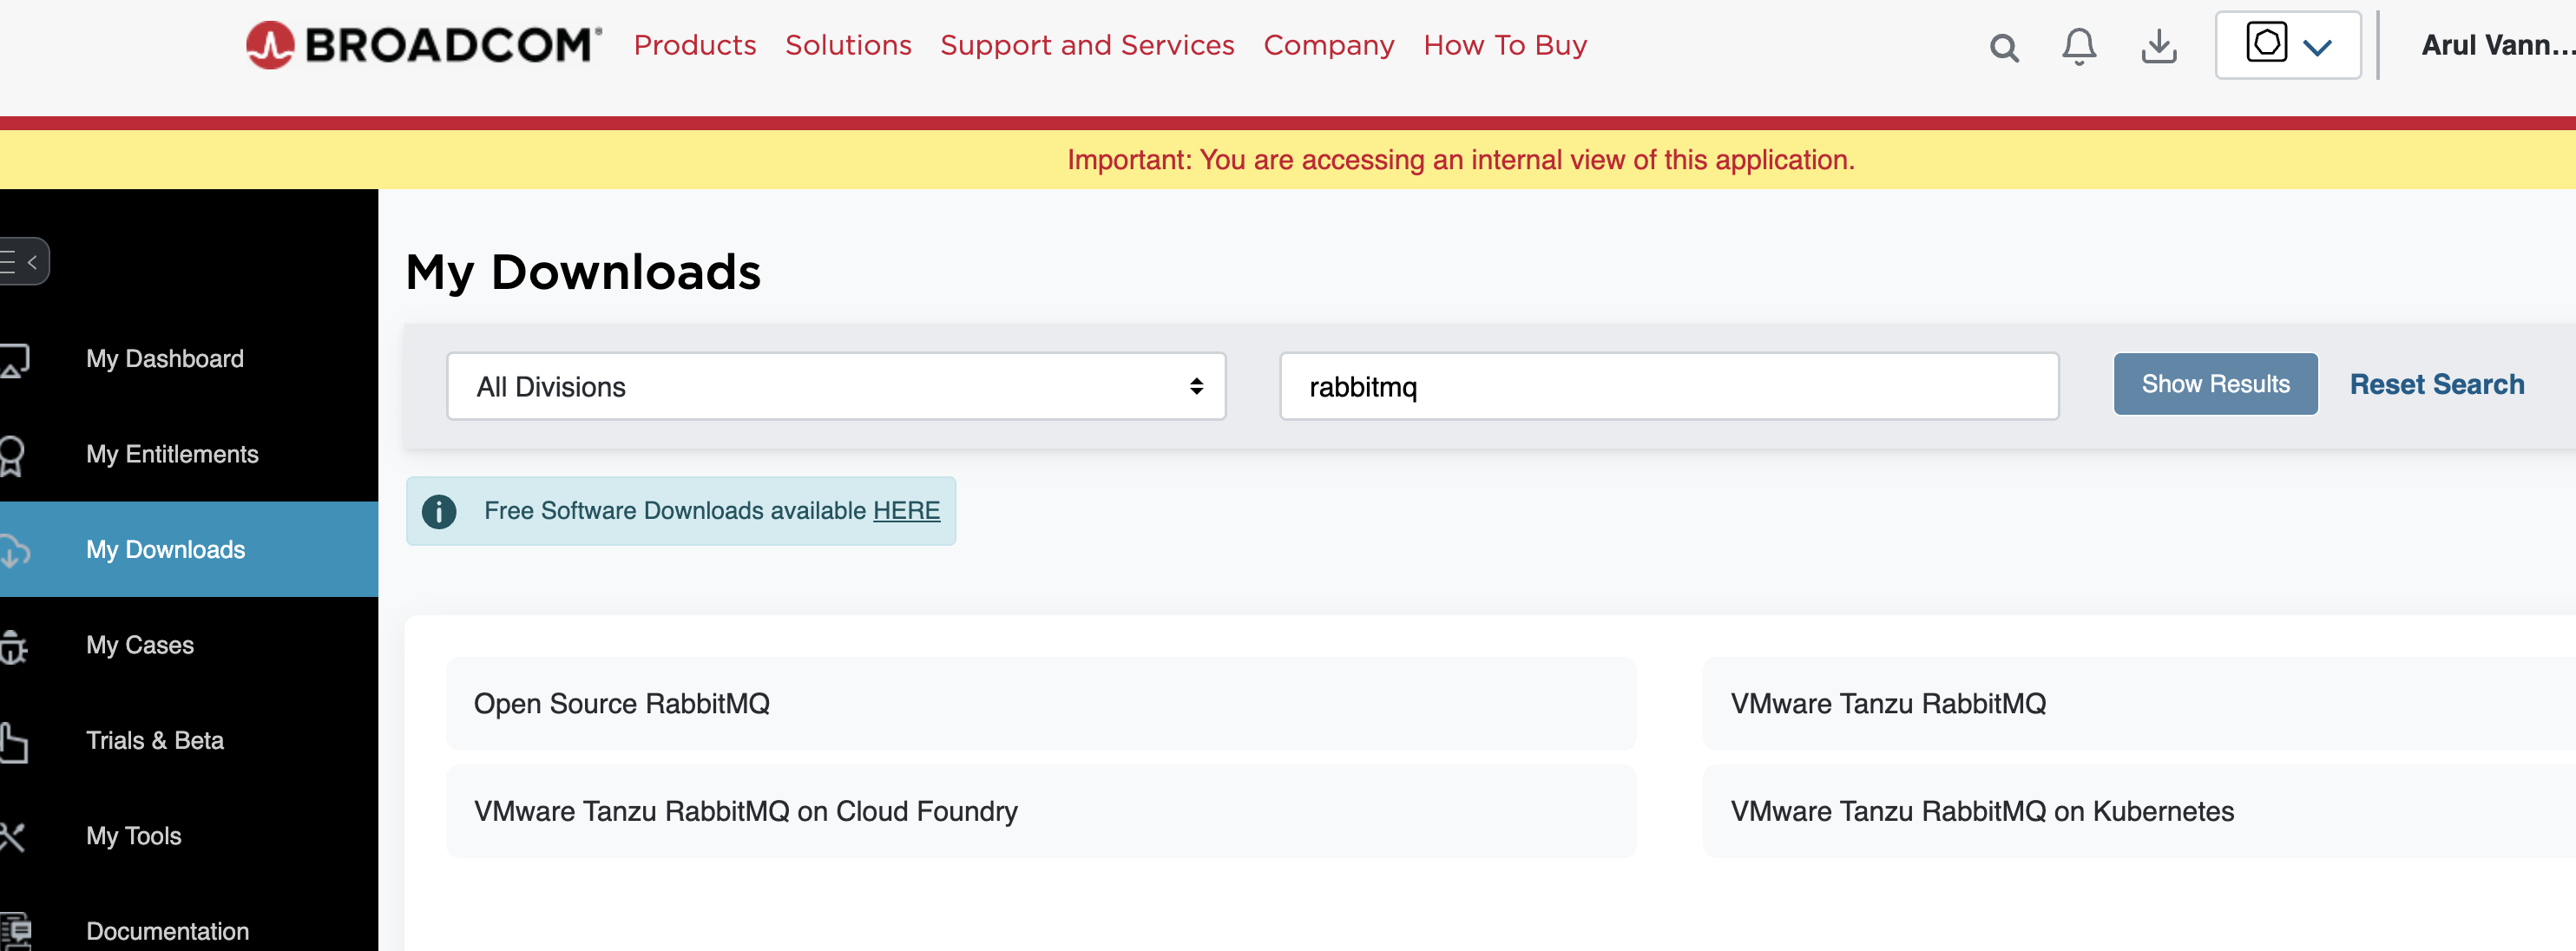
🚀🐰📦 Install instruction for Enterprise RabbitMQ on Kubernetes.🚀🐰📦
Install Cert Manager
1
kubectl apply -f https://github.com/cert-manager/cert-manager/releases/download/v1.5.3/cert-manager.yaml
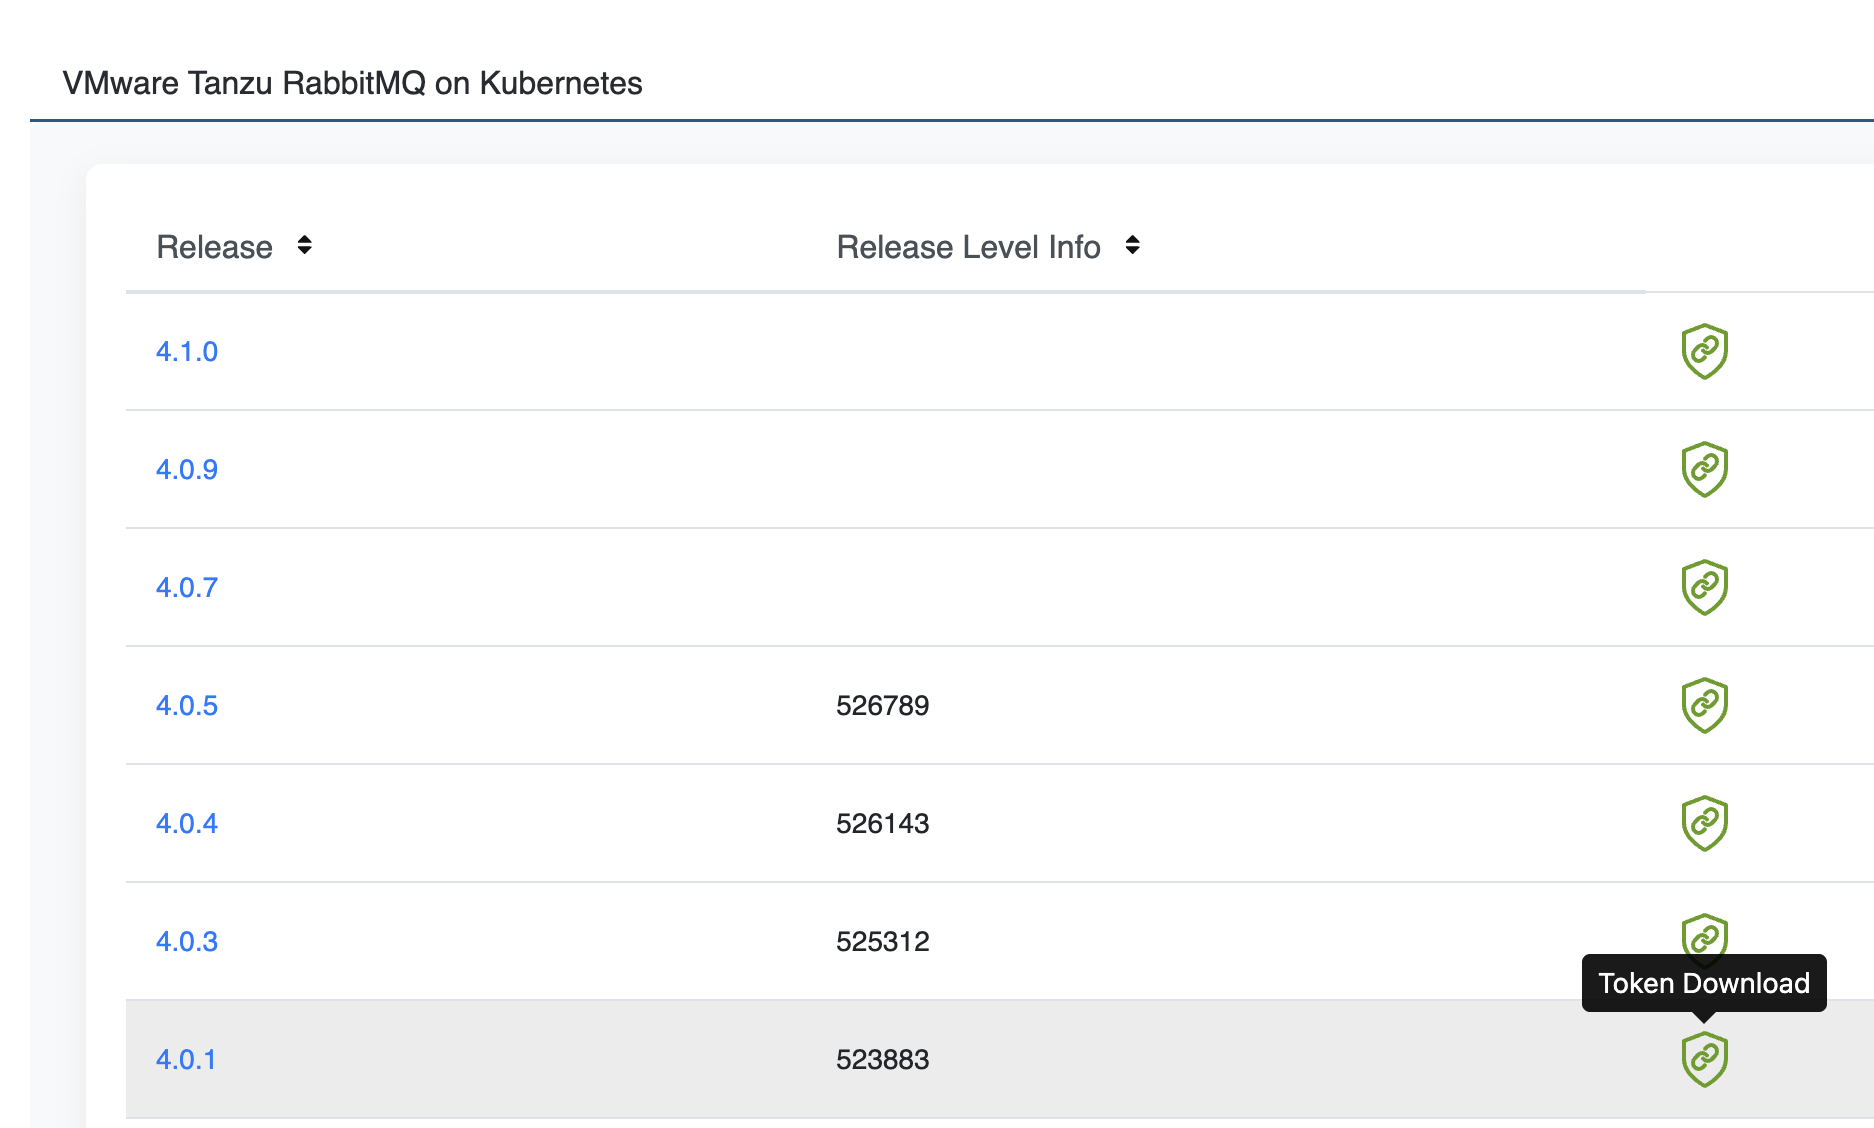
Grab your Broadcom Support Token form broadcom support portal and set it as an environment variable.
1
export token="<YOUR-BROADCOM-SUPPORT-TOKEN-FOR-RMQ-K8S>"
Login to Broadcom registry.
1
helm registry login rabbitmq-helmoci.packages.broadcom.com -u username -p $token
Create teh rabbitmq-system namespace to install the RMQ Enterprise Operators.
1
kubectl create ns rabbitmq-system
Create a docker-registry secret to be able to pull the images
1
kubectl create secret docker-registry tanzu-rabbitmq-registry-creds --docker-server "rabbitmq.packages.broadcom.com" --docker-username "support-registered-email" --docker-password $token -n rabbitmq-system
Install the RMQ Enterprise Operators.
1
helm install tanzu-rabbitmq oci://rabbitmq-helmoci.packages.broadcom.com/tanzu-rabbitmq-operators --version 4.0.1 --namespace rabbitmq-system
Verify Enterprise RMQ Operators installations
1
kubectl get pods  -n rabbitmq-system
Sample output
1
2
3
NAME                                           READY   STATUS    RESTARTS   AGE
messaging-topology-operator-68bdb4ffcd-9fq6n   1/1     Running   0          54m
rabbitmq-cluster-operator-645d7645c-sshhm      1/1     Running   0          54m
Deploying the setup
Please review the yaml file for the configuration on how you define the users and permission levearging the Messaging toplogy Operator.
This Kubernetes configuration defines an upstream RabbitMQ cluster named upstream-rabbit with specific plugins enabled, including stream, schema sync, and standby replication. It configures schema and standby replication to connect to specific endpoints with provided credentials.
A Secret named upstream-secret stores the username and password. A User named rabbitmq-replicator is created, referencing the upstream cluster and importing credentials from the Secret. Permissions are granted to this user for the rabbitmq_schema_definition_sync vhost and a new vhost named test.
A Policy named upstream-policy is applied to queues in the test vhost, enabling remote data center replication. Finally, configurations for the default vhost (“/”) are also included with similar replication policies and permissions for the rabbitmq-replicator user.
1
kubectl apply -f upstream-config.yaml
- This Kubernetes configuration defines a downstream RabbitMQ cluster, downstream-rabbit, designed to replicate schema and data from an upstream cluster. It enables necessary plugins like stream and standby replication. The configuration specifies the upstream connection details, including address and credentials. It also defines rules for synchronizing schema definitions and managing local entities (users, queues, etc.) on the downstream cluster, filtering out those matching specified patterns.
1
kubectl apply -f downstream-config.yaml
Intall RabbitmqAdmin CLI
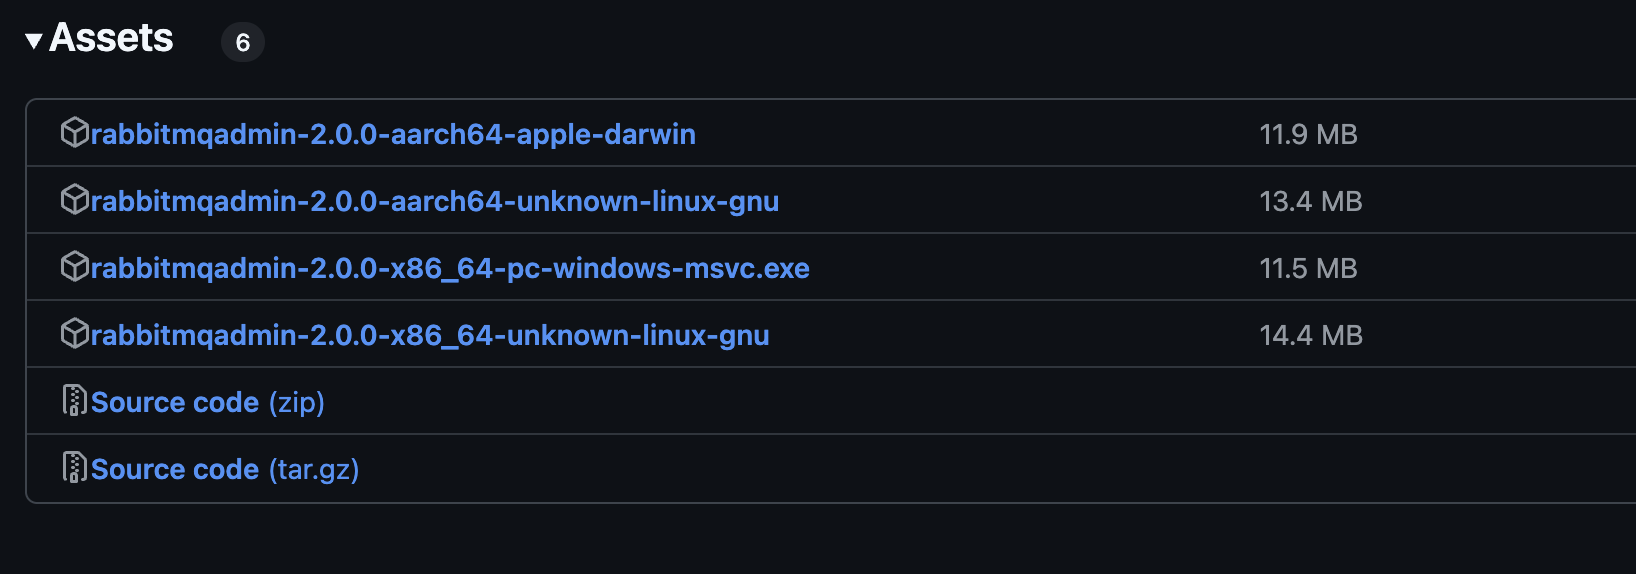
Interacting with RabbitMQ Server using rabbitmqadmin v2 CLI . Below steps work on MAC. For other OS please download the executalbe from git releases and move it to /usr/local/bin.
Access the releases: https://github.com/rabbitmq/rabbitmqadmin-ng/releases
Download the binary for your OS, update permission and move it bin folder
1
2
3
4
5
6
wget https://github.com/rabbitmq/rabbitmqadmin-ng/releases/download/v2.1.0/rabbitmqadmin-2.1.0-aarch64-apple-darwin
cp rabbitmqadmin-2.1.0-aarch64-apple-darwin rmqadmin
chmod +x rmqadmin
sudo mv rmqadmin /usr/local/bin
rmqadmin --help
🚀🐰📦 LAB 2: Creating User and Permissions 🚀🐰📦
https://www.rabbitmq.com/docs/access-control
NOTE The RMQ Operators create a default user we will use those creds to login to WebUI.
You can control user permissions. Below are sample commands to create a admin user.
1
2
3
4
5
6
7
8
9
10

kubectl -n default exec upstream-rabbit-server-0 -- rabbitmqctl add_user arul password
kubectl -n default exec upstream-rabbit-server-0 -- rabbitmqctl set_permissions  -p / arul ".*" ".*" ".*"
kubectl -n default exec upstream-rabbit-server-0 -- rabbitmqctl set_user_tags arul administrator


kubectl -n default exec downstream-rabbit-server-0 -- rabbitmqctl add_user arul password
kubectl -n default exec downstream-rabbit-server-0 -- rabbitmqctl set_permissions  -p / arul ".*" ".*" ".*"
kubectl -n default exec downstream-rabbit-server-0 -- rabbitmqctl set_user_tags arul administrator
Pull the default username and password created as a k8s Secret for RMQ:
Below perftest are configured to user defalut user created by the operator. Run this in your terminal for the instance you want run the below labs. The below script will export the username and password to your terminal session.
1
2
3
4
5
6
7
8
9
10
11
12
13
14
instance=upstream-rabbit
username=$(kubectl -n default   get secret ${instance}-default-user -o jsonpath="{.data.username}" | base64 --decode)
password=$(kubectl -n default   get secret ${instance}-default-user -o jsonpath="{.data.password}" | base64 --decode)
service=${instance}
echo $username
echo $password

instance=downstream-rabbit
username=$(kubectl -n default   get secret ${instance}-default-user -o jsonpath="{.data.username}" | base64 --decode)
password=$(kubectl -n default   get secret ${instance}-default-user -o jsonpath="{.data.password}" | base64 --decode)
service=${instance}
echo $username
echo $password
🚀🐰📦 LAB 3: Access RMQ Management UI 🚀🐰📦
When running on container platforms like kubernetes, we need to port forward to access the management UI. You can access the blue and green cluster using the below urls.
Upstream RMQ Server port-forward to port 15672
1
kubectl port-forward svc/upstream-rabbit 15672:15672
Downstream RMQ Server port-forward to port 15673
1
kubectl -n default port-forward svc/downstream-rabbit 15673:15672
Access Upstream RMQ at: http://localhost:15672
Access Downstream RMQ http://localhost:15673
Use the above default username password
🚀🐰📦 LAB 4: Standby Replication (Enterprise feature for RMQ) 🚀🐰📦
NOTE: Most of configuration is done via yaml. Please review the upstream-config.yaml and downstream-config.yaml for standby replication configuration.
- Specify local (upstream cluster) nodes and credentials to be used for WSR.
- Note that the target port is that of the RabbitMQ Stream protocol, not AMQP 1.0.
1
kubectl -n default exec downstream-rabbit-server-0 -- rabbitmqctl set_standby_replication_upstream_endpoints '{"endpoints": ["upstream-rabbit:5552","upstream2-rabbit:5552","upstream3-rabbit:5552"], "username": "test-user", "password": "test-password"}'
- Create a user and grant it permissions to the virtual host that will be used for schema replication.
- This command is similar to ‘rabbitmqctl add_user’ but also grants full permissions to the virtual host used for definition sync.
1
kubectl -n default exec downstream-rabbit-server-0 --  rabbitmqctl add_schema_replication_user "test-user" "test-password"
- specify local (upstream cluster) nodes and credentials to be used for schema replication
1
kubectl -n default exec downstream-rabbit-server-0 -- rabbitmqctl set_schema_replication_upstream_endpoints '{"endpoints": ["upstream-rabbit:5672","upstream2-rabbit:5672","upstream3-rabbit:5672"], "username": "test-user", "password": "test-password"}'
🚀🐰📦 LAB 5: Deploy Producers and Consumer Applications - Leveraging RabbitMQ PerfTest 🚀🐰📦
RMQPerf Test on k8s:
More about RMQPerf Test: https://perftest.rabbitmq.com/
“RabbitMQ has a throughput testing tool, PerfTest, that is based on the Java client and can be configured to simulate basic workloads and more advanced workloads as well. PerfTest has extra tools that produce HTML graphs of the output.
A RabbitMQ cluster can be limited by a number of factors, from infrastructure-level constraints (e.g. network bandwidth) to RabbitMQ configuration and topology to applications that publish and consume. PerfTest can demonstrate baseline performance of a node or a cluster of nodes.
PerfTest uses the AMQP 0.9.1 protocol to communicate with a RabbitMQ cluster. Use Stream PerfTest if you want to test RabbitMQ Streams with the stream protocol.”
Classic Queue Perf Test
These kubectl run commands launch one-off Kubernetes Pods in the default namespace to run RabbitMQ performance tests using the pivotalrabbitmq/perf-test image.
The first command starts a Pod named sa-workshop with 10 producers sending 10,000 messages each to a pre-declared queue “sa-workshop” with routing key “sa-workshop” at a rate of 100 messages/second. It also starts 5 consumers reading from the same queue at 10 messages/second, acknowledging every 10 messages. The queue will not auto-delete.
The second command starts a Pod named sa-workshop-new with 10 producers sending 10,000 messages each to a pre-declared queue “sa-workshop-new” with routing key “sa-workshop-new” at a rate of 100 messages/second. This test does not include any consumers, and the queue will also not auto-delete.
Both commands target the RabbitMQ instance specified by the $service URI using provided credentials. They are designed to generate load on the RabbitMQ server for performance evaluation.
1
2
3
4
5
6
7
8
9
10
11
12
instance=upstream-rabbit
username=$(kubectl -n default   get secret ${instance}-default-user -o jsonpath="{.data.username}" | base64 --decode)
password=$(kubectl -n default   get secret ${instance}-default-user -o jsonpath="{.data.password}" | base64 --decode)
service=${instance}
echo $username
echo $password


kubectl -n default  --restart=Never run sa-workshop --image=pivotalrabbitmq/perf-test -- --uri "amqp://${username}:${password}@${service}" --producers 10 --consumers 5 --predeclared --routing-key "sa-workshop" --pmessages 10000 --queue "sa-workshop" --rate 100 --consumer-rate 10 --multi-ack-every 10 --auto-delete false

kubectl -n default  --restart=Never run sa-workshop-new --image=pivotalrabbitmq/perf-test -- --uri "amqp://${username}:${password}@${service}" --producers 10  --predeclared --routing-key "sa-workshop-new" --pmessages 10000 --queue "sa-workshop-new" --rate 100 --auto-delete false
Quorum Queue Perf Test
These kubectl run commands initiate performance tests against a RabbitMQ instance (specified by $service) within the default namespace as one-off Pods, except for perf-syn-check.
The first command (sa-workshop-quorum) tests a quorum queue. It uses 10 producers sending 1,000 messages each to a pre-declared “sa-workshop-quorum” queue with the same routing key at 100 messages/second. 5 consumers read from it at 10 messages/second, acknowledging every 10 messages.
The second command (sa-workshop-quorum-new) also tests a quorum queue. It uses 10 producers sending 1,000 messages each to a pre-declared “sa-workshop-quorum” queue (note the queue name is the same as the first command, potentially leading to interaction) with the routing key “sa-workshop-quorum-new” at 100 messages/second. It has no consumers.
The third command (perf-syn-check) runs persistently (–restart=Always) to perform a synthetic health check. It sends 5 persistent messages to the “q.sys.synthetic-health-check” queue over 120 iterations with specific message size, batch size, and other parameters, using one consumer.
1
2
3
4
5
6
7
8
9
10
11
12
13
14
instance=upstream-rabbit
username=$(kubectl -n default   get secret ${instance}-default-user -o jsonpath="{.data.username}" | base64 --decode)
password=$(kubectl -n default   get secret ${instance}-default-user -o jsonpath="{.data.password}" | base64 --decode)
service=${instance}
echo $username
echo $password


kubectl -n default  --restart=Never run sa-workshop-quorum --image=pivotalrabbitmq/perf-test -- --uri "amqp://${username}:${password}@${service}" --quorum-queue --producers 10 --consumers 5 --predeclared --routing-key "sa-workshop-quorum" --pmessages 1000 --queue "sa-workshop-quorum" --rate 100 --consumer-rate 10 --multi-ack-every 10

kubectl -n default  --restart=Never run sa-workshop-quorum-new --image=pivotalrabbitmq/perf-test -- --uri "amqp://${username}:${password}@${service}" --quorum-queue --producers 10  --predeclared --routing-key "sa-workshop-quorum-new" --pmessages 1000 --queue "sa-workshop-quorum" --rate 100

kubectl -n default  --restart=Always run perf-syn-check --image=pivotalrabbitmq/perf-test -- --uri "amqp://${username}:${password}@${service}" -i 120 -u "q.sys.synthetic-health-check" -qq -P 5 -ms -b 20 -hst 4 -dcr -c 1 -q 5
Stream RMQ Perftest
This kubectl run command deploys a persistent Pod named stream in the default namespace. It uses the pivotalrabbitmq/perf-test image to benchmark a RabbitMQ stream queue.
The test involves 10 producers sending a total of 100,000 messages to a pre-declared stream queue named “sa-workshop-stream” with the routing key “sa-workshop-stream” at 100 messages/second per producer. Simultaneously, 5 consumers read from the same stream queue at 10 messages/second each, acknowledging every message. Each consumer uses 10 concurrent connections. This command continuously evaluates the performance of RabbitMQ streams under load.
1
2
3
4
5
6
7
8
instance=upstream-rabbit
username=$(kubectl -n default   get secret ${instance}-default-user -o jsonpath="{.data.username}" | base64 --decode)
password=$(kubectl -n default   get secret ${instance}-default-user -o jsonpath="{.data.password}" | base64 --decode)
service=${instance}
echo $username
echo $password

kubectl -n default  --restart=Always run stream --image=pivotalrabbitmq/perf-test -- --uri "amqp://${username}:${password}@${service}" --stream-queue --producers 10 --consumers 5 --predeclared --routing-key "sa-workshop-stream" --pmessages 10000 --queue "sa-workshop-stream" --rate 100 --consumer-rate 10 --multi-ack-every 1 -c 10
🚀🐰📦 LAB 6: Everyday I’m Shovelling 🚀🐰📦
We have enabled Shovel pulgin on the cluster via yaml configurations. Shovel is an amazing plugin you can leverage to move messages from one to another queue.
Usecases:
- Moving messages between queues on same or different cluster
- Queues types changed
- Queue names changed
- Queue is full and need to be drained
This kubectl exec command directly executes rabbitmqctl within the upstream-rabbit-server-0 Pod in the default namespace. It configures a shovel named my-shovel.
This shovel is set up to move messages from the quorum queue named sa-workshop-quorum on the upstream-rabbit service to another queue named sa-workshop-shovelq on the same service. The destination queue sa-workshop-shovelq is explicitly created as a quorum queue using the dest-queue-args. This command essentially sets up a mechanism to transfer messages between two quorum queues within the same RabbitMQ cluster. The rabbitmq_shovel plugin must be enabled for this to function.
- Below command will move messages from
sa-workshop-streamtosa-workshop-shovel
1
kubectl -n default exec upstream-rabbit-server-0 --  rabbitmqctl set_parameter shovel my-shovel '{"src-protocol": "amqp091", "src-uri": "amqp://arul:password@upstream-rabbit.default.svc.cluster.local:5672", "src-queue": "sa-workshop-quorum", "dest-protocol": "amqp091", "dest-uri": "amqp://arul:password@upstream-rabbit.default.svc.cluster.local:5672", "dest-queue": "sa-workshop-shovelq", "dest-queue-args": {"x-queue-type": "quorum"}}'
- Below command will move messages from
sa-workshop-shovelqtosa-workshop-shovelq-green1
kubectl -n default exec upstream-rabbit-server-0 -- rabbitmqctl set_parameter shovel my-shovel '{"src-protocol": "amqp091", "src-uri": "amqp://arul:password@upstream-rabbit.default.svc.cluster.local:5672", "src-queue": "sa-workshop-shovelq", "dest-protocol": "amqp091", "dest-uri": "amqp://arul:password@upstream-rabbit.default.svc.cluster.local:5672", "dest-queue": "sa-workshop-shovelq-green", "dest-queue-args": {"x-queue-type": "quorum"}}'
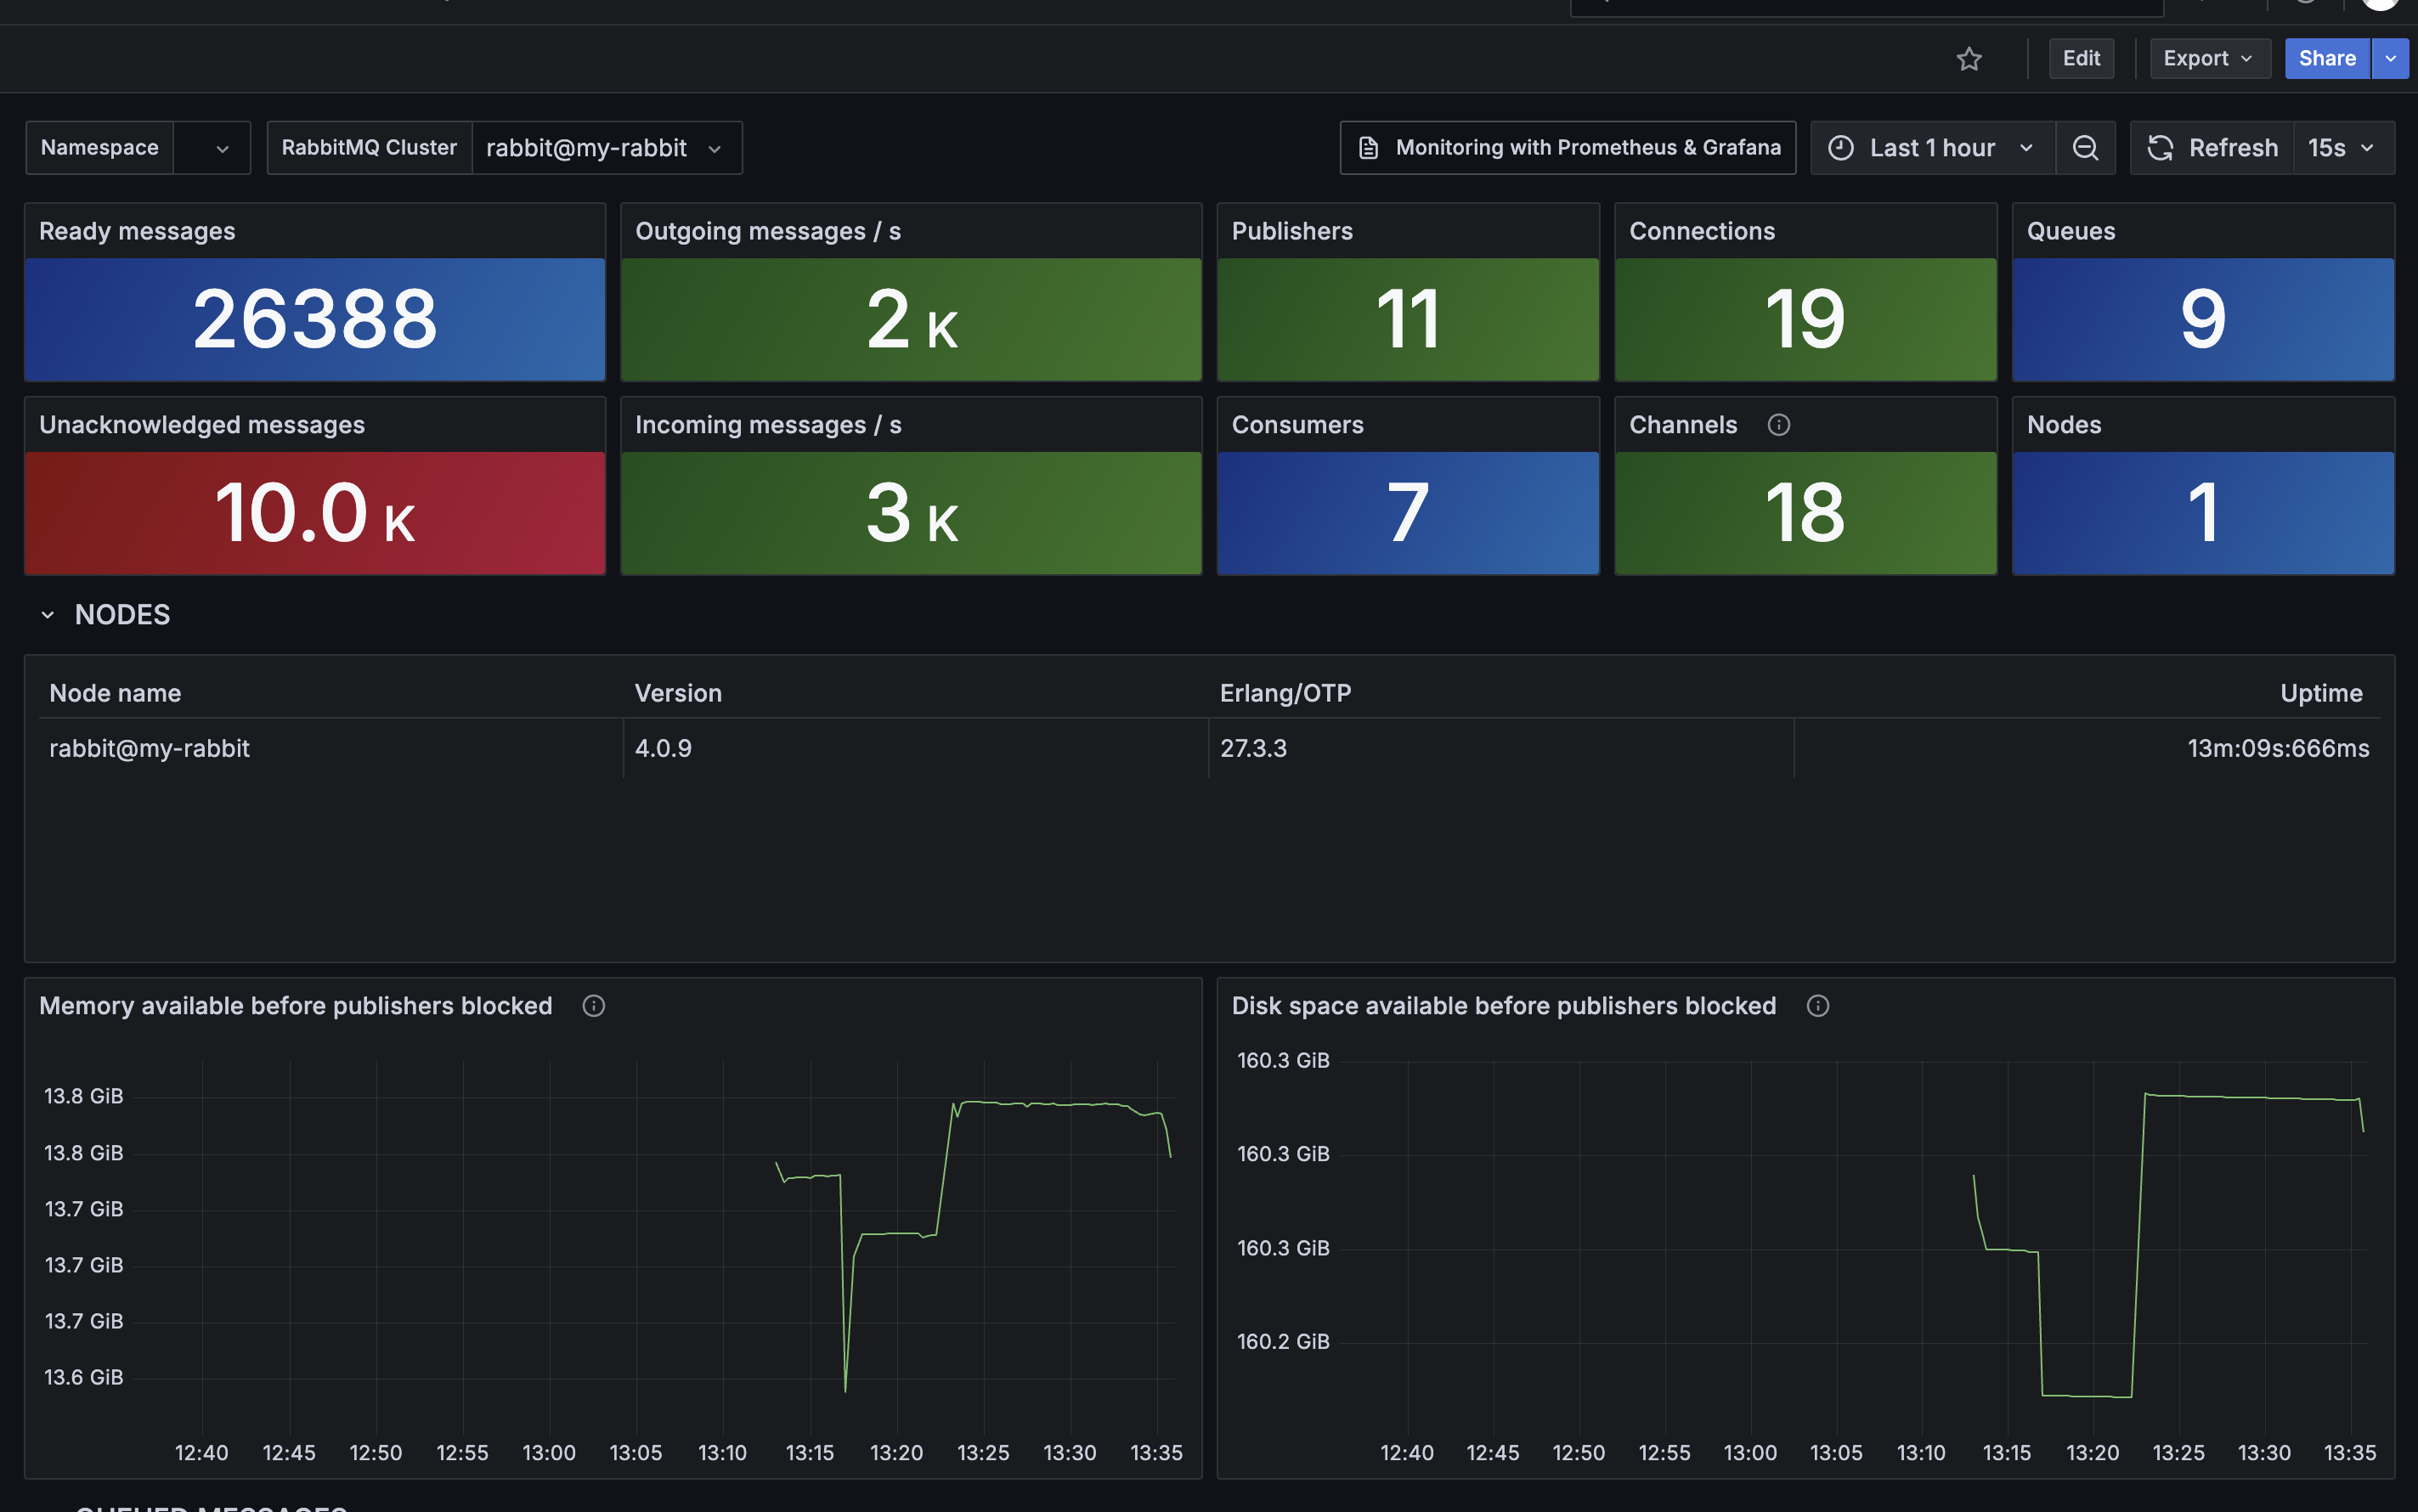
🚀🐰📦 Lab 7: Monitoring RabbitMQ with Prometheus and Grafana 🚀🐰📦
1
2
helm repo add prometheus-community https://prometheus-community.github.io/helm-charts
helm repo add grafana https://grafana.github.io/helm-charts
1
2
helm install prometheus  prometheus-community/prometheus
helm install  grafana grafana/grafana
Annotate rmq pods to be able to scrape the prometheus metrics
1
2
3
4
kubectl annotate pods --all prometheus.io/path=/metrics prometheus.io/port=15692 prometheus.io/scheme=http prometheus.io/scrape=true

kubectl annotate pods --all prometheus.io/path=/metrics prometheus.io/port=15692 prometheus.io/scheme=http prometheus.io/scrape=true -n default
Access Grafana
1
2
3
4
kubectl get secret --namespace default grafana -o jsonpath="{.data.admin-password}" | base64 --decode ; echo

export POD_NAME=$(kubectl get pods --namespace default -l "app.kubernetes.io/name=grafana,app.kubernetes.io/instance=grafana" -o jsonpath="{.items[0].metadata.name}")
     kubectl --namespace default port-forward $POD_NAME 3000
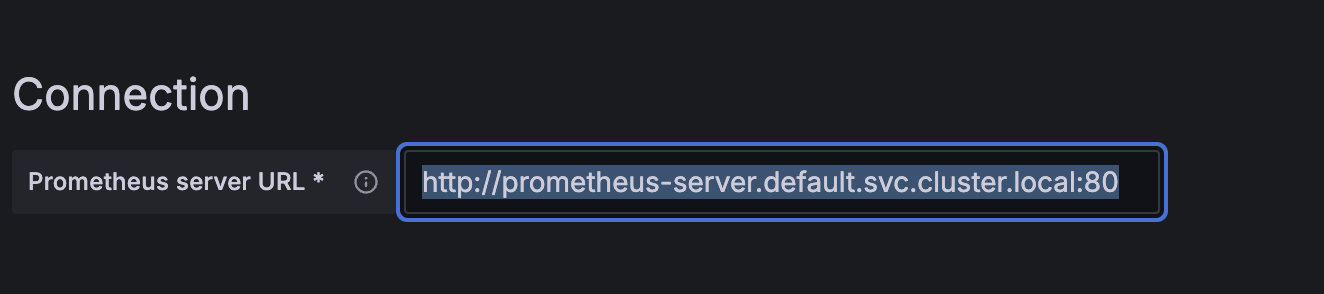
Add prometheus datasource to Grafana
Click on “Add your first data soruce” > select prometheus > http://prometheus-server.default.svc.cluster.local:80 > save and test
1
http://prometheus-server.default.svc.cluster.local:80
Add RMQ-Overview Dashboard
Click on create new dasboard > Import > copy the json code from rmq-overview.json file and paste it in json field and use the prometheus datasource
🚀🐰📦 Lab 8: Disaster Recovery 🚀🐰📦
Inspecting Standby Replication on Downstream RMQ
We can use the below command to validate standby replication on the Downstream RabbitMQ instance.
1
kubectl -n default exec downstream-rabbit-server-0 -- rabbitmq-diagnostics inspect_local_data_available_for_standby_replication_recovery
1
kubectl -n default exec downstream-rabbit-server-0 -- rabbitmq-diagnostics inspect_local_stream_data_available_for_standby_replication_recovery
1
kubectl -n default exec downstream-rabbit-server-0 -- rabbitmqctl list_streams_available_for_standby_replication_recovery
1
kubectl -n default exec downstream-rabbit-server-0 --  rabbitmqctl list_vhosts_available_for_standby_replication_recovery
🚀🐰📦 LAB 9: Upgrading RMQ on K8s 🚀🐰📦
Upgrade the RMQ k8s operator to the latest version using Helm
1
helm upgrade tanzu-rabbitmq oci://rabbitmq-helmoci.packages.broadcom.com/tanzu-rabbitmq-operators --namespace rabbitmq-system
Verify Enterprise RMQ Operations Upgrade for Operators
1
kubectl get pods  -n rabbitmq-system
Edit the upstream-rabbit-new cluster yaml and remove the image line and save it.
1
k edit rabbitmqclusters.rabbitmq.com -n default upstream-rabbit
Repeate the above for downstream cluster to perform upgrade
1
k edit rabbitmqclusters.rabbitmq.com -n default downstream-rabbit
🚀🐰📦 LAB 10: Working RabbitmqAdmin cli 🚀🐰📦
NOTE To simply interacting with rabbitmqadmin v2 cli. We can create the below guest user with admin priviliages. Consider using the default creds and specifiy them as options to rabbitmqadmin v2 cli.
1
2
3
kubectl -n default exec upstream-rabbit-server-0 -- rabbitmqctl add_user guest guest
kubectl -n default exec upstream-rabbit-server-0 -- rabbitmqctl set_permissions  -p / guest ".*" ".*" ".*"
kubectl -n default exec upstream-rabbit-server-0 -- rabbitmqctl set_user_tags guest administrator
Delcare a queue
1
2
rmqadmin declare queue --name demo
rmqadmin declare queue --name demoQrorum --type quorum
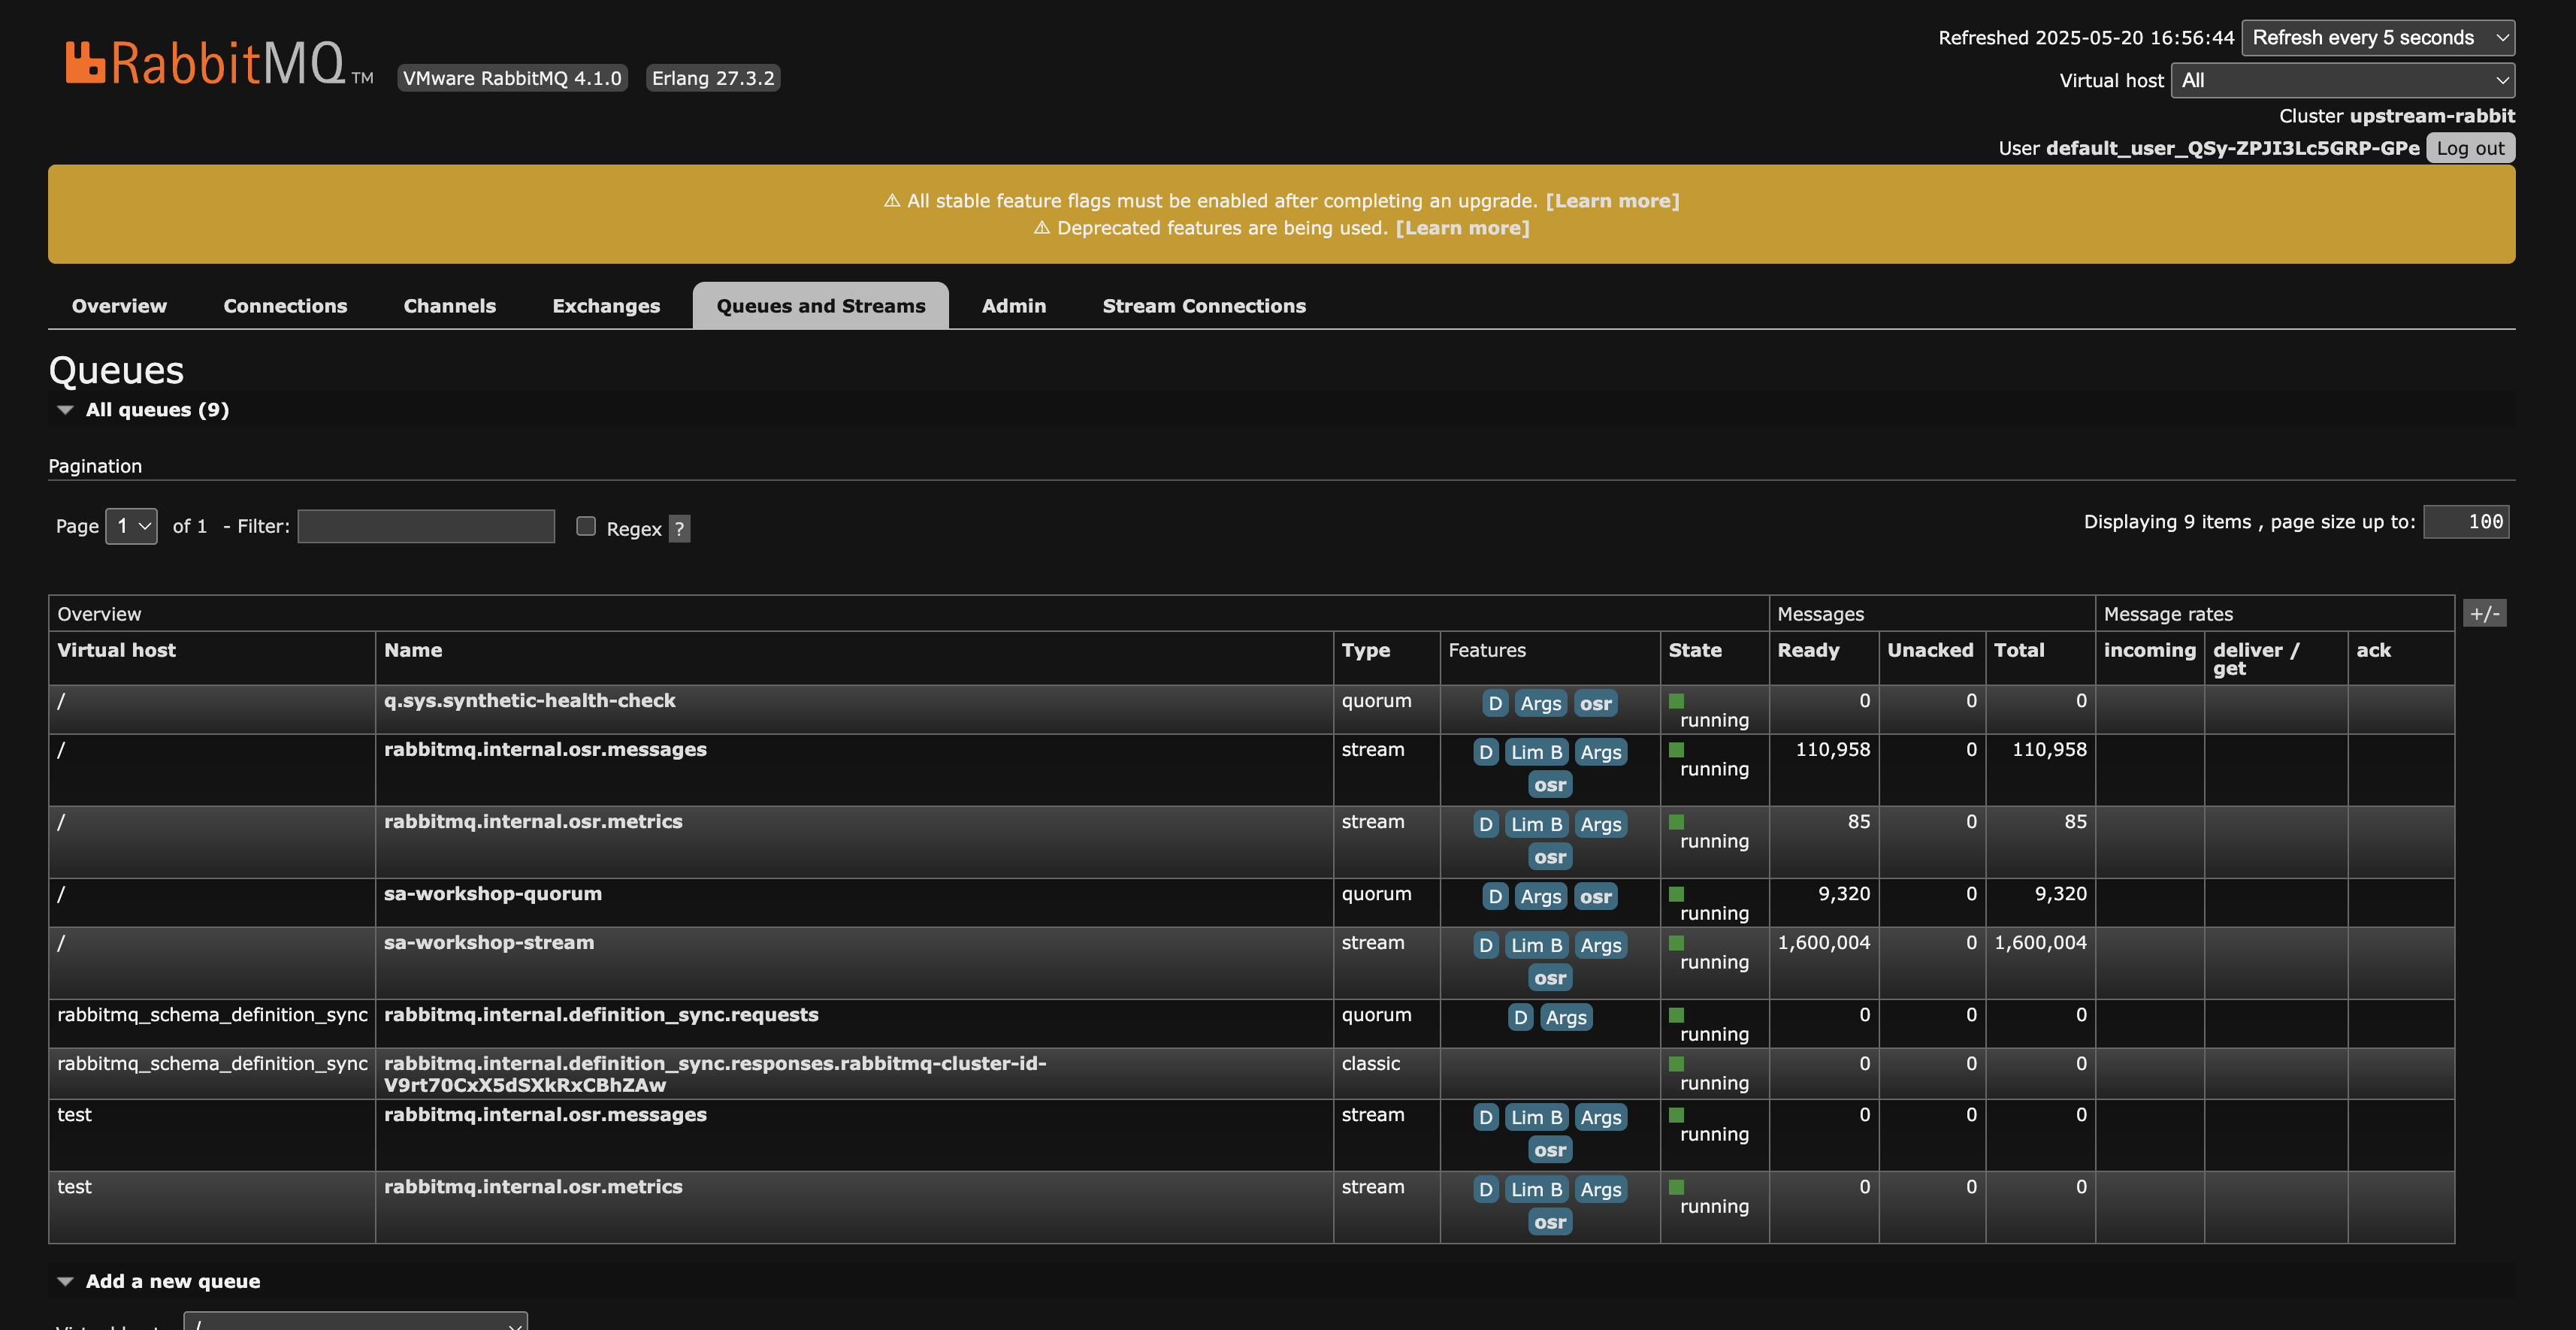
List Queues
1
rmqadmin list queues
Show Memory Breakdown %
1
rmqadmin show memory_breakdown_in_percent  --node rabbit@upstream-rabbit-server-0.upstream-rabbit-nodes.default
🚀🐰📦 LAB 11: Promoting Downstream RMQ
1
kubectl -n default exec downstream-rabbit-server-0 --  rabbitmqctl promote_standby_replication_downstream_cluster
🚀🐰📦 LAB 12: Scaling RMQ 🚀🐰📦
1
k scale statefulsets.apps upstream-rabbit-server --replicas=3
1
k scale statefulsets.apps downstream-rabbit-server --replicas=3
RabbitMQ Tutorials cover the basics of creating messaging applications using RabbitMQ.
RabbitMQ Labs for Developers and DevOps Engineers
Currenty the below appdev labs leverages docker rmq for the hands on labs.
🚀🐰📦 RabbitMQ HTTP API Reference:🚀🐰📦
http://localhost:15672/api/index.html
1
curl -i -u guest:guest http://localhost:15672/api/vhosts
1
rmqadmin --host=localhost --port=15672  --username=guest --password=guest  show overview
1
rmqadmin --host=localhost --port=15672  --username=arul --password=password  show churn
🚀🐰📦 Everthing about Streams: (All you need is a Stream) 🚀🐰📦
https://www.youtube.com/watch?v=gbf1_aqVKL0&ab_channel=VMwareTanzu
🎉 Congratulations, Messaging Maestro! 🎉 You’ve now taken a fantastic journey through deploying and interacting with RabbitMQ on Kubernetes! You’ve installed the operator, deployed single and multi-node clusters, enabled plugins, managed users, and even run performance tests.
Keep exploring, experimenting, and having fun with RabbitMQ and Kubernetes! The world of distributed messaging awaits your command! 🚀🐰📦
🎶🥁🚀🐰📦 One Server to Queue them All !!!!!!! 🚀🐰📦🥁🎶
An AI generated song dedicated to RabbitMQ. Enjoy the music! 🎶🥁🚀🐰📦
Troubleshooting
- Verfity typo in token or username when logging to helm repo to pull enterprise images
- Check the pods logs
- Kubectl cmd to clean up pods that are not in Running State. Usefull when trying to rerun perftest pods
1
kubectl -n default delete pod $(kubectl -n default get pod -o jsonpath='{.items[?(@.status.phase!="Running")].metadata.name}')