Unleashing the Power of Kubernetes on Your Mac
Unleashing the Power of Kubernetes on Your Mac: A Journey of Discovery
Developers and Operations are constantly seeking ways to push the boundaries of what’s possible. We yearn for environments that mirror production, allowing us to iterate, experiment, and ultimately, innovate with confidence. For those of us wielding the sleek power of a Mac, especially the revolutionary M-series chips, the desire to run Kubernetes locally has become a compelling quest.
This isn’t just about running containers; it’s about embracing the full orchestra of Kubernetes – the control plane, the worker nodes, the intricate dance of orchestration that empowers modern applications. And while the path might seem daunting, fear not, fellow explorers! This guide is your compass, leading you through the heartwarming journey of setting up your very own kubeadm Kubernetes cluster right here on your beloved Mac.
The Call to Adventure: Why Local Kubernetes Matters
Why embark on this adventure? The reasons are as varied and inspiring as the projects we build:
- Familiar Territory: Develop and test your Kubernetes applications in an environment that closely resembles your target deployment, all within the comfort of your local machine.
- Offline Freedom: No internet? No problem! Your local cluster is your sandbox, ready for exploration anytime, anywhere.
- Resource Control: Fine-tune resource allocation to match your development needs, without the constraints of shared cloud environments.
- Deep Dive Learning: Gain an intimate understanding of Kubernetes internals by managing your own cluster from the ground up.
- Faster Iteration: Test changes and debug issues locally before deploying to production, saving valuable time and resources.
Charting Our Course: Setup Options
Before we raise the sails, let’s consider the vessels that will carry us on this voyage:
Multipass Magic (Recommended for M-Series Macs)
Multipass, a lightweight VM manager from Canonical, is a fantastic choice for macOS, especially on the efficient ARM architecture of M1/M2/M3/M4 chips. It’s streamlined, easy to use, and integrates beautifully with the Mac environment.
Setting Sail on macOS:
1
brew install multipass
Setting Sail on Ubuntu:
Follow the official guide: https://ubuntu.com/server/docs/how-to-create-a-vm-with-multipass
The Stalwart VirtualBox
A long-standing and reliable virtualization solution, VirtualBox remains a viable option for running VMs on your Mac.
https://www.virtualbox.org/wiki/Downloads
The UTM Explorer
UTM provides a user-friendly interface for running virtual machines on macOS, leveraging the power of virtualization on Apple Silicon.
https://mac.getutm.app/
Gathering Supplies: Ubuntu Images
Whether you choose Multipass, VirtualBox, or UTM, you’ll need an Ubuntu image for your virtual machines.
From the UTM Gallery (Effortless Choice for UTM Users): https://mac.getutm.app/gallery/
Direct Download (For All Options):
Ubuntu Desktop (GUI for easier initial exploration): https://ubuntu.com/download/desktop Ubuntu Server (Lightweight and command-line focused): https://cdimage.ubuntu.com/ubuntu/releases/
Your First Kubernetes Melody
Let’s begin with a single-node cluster – a perfect way to grasp the fundamentals.
Step 1: Preparing the Multipass Stage
1
brew install multipass
Step 2: Launching Your Virtual Machine
1
multipass launch --name control-plane --cpus 2 --memory 2GB --disk 20GB

Step 3: Installing the Kubernetes Harmonics Dive into your newly created VM:
1
multipass shell control-plane
Now, let’s lay the groundwork for Kubernetes:
1
2
3
4
sudo apt update
git clone [https://github.com/cfkubo/k8s-security](https://github.com/cfkubo/k8s-security)
cd k8s-security
sh k8s.sh
This script will handle the installation of necessary packages like containerd, kubeadm, kubelet, and kubectl, and initialize your single-node Kubernetes cluster.
Expanding Horizons: A Multi-Node Kubernetes Ensemble
Ready to orchestrate a more complex environment? Let’s bring in worker nodes to join our control plane.
Step 1: Setting Up the Multipass Infrastructure
1
brew install multipass
Step 2: Creating the Virtual Machine Ensemble
1
2
3
multipass launch --name control-plane --cpus 2 --memory 2GB --disk 20GB
multipass launch --name worker01 --cpus 2 --memory 2GB --disk 20GB
multipass launch --name worker02 --cpus 2  --memory 2GB --disk 20GB
Feel free to launch more worker nodes as needed!
Step 3: Preparing the Control Plane Enter the control plane VM:
1
multipass shell control-plane
Install Kubernetes components on the control plane:
1
2
3
4
sudo apt update
git clone [https://github.com/cfkubo/k8s-security](https://github.com/cfkubo/k8s-security)
cd k8s-security
sh k8s.sh
Step 4: The Invitation to Join: Retrieving the Join Command After the control plane initializes, you’ll need the kubeadm join command to add worker nodes. Find it in the logs:
1
cat k8s-log.txt | grep join -A 2

Copy this command – it contains a unique token and the control plane’s IP address and port.
Step 5: Stepping into the Worker Node Open a new terminal and access your first worker node:
1
multipass shell worker01
Step 6: Preparing the Worker Node Install the necessary Kubernetes components on the worker node:
1
2
3
4
sudo apt update
git clone [https://github.com/cfkubo/k8s-security](https://github.com/cfkubo/k8s-security)
cd k8s-security
sh k8s-worker.sh
Step 7: Joining the Kubernetes Chorus Now, execute the kubeadm join command you copied from the control plane in Step 4:
1
kubeadm join <your_control_plane_ip>:<port> --token <your_token> --discovery-token-ca-cert-hash sha256:<your_hash>
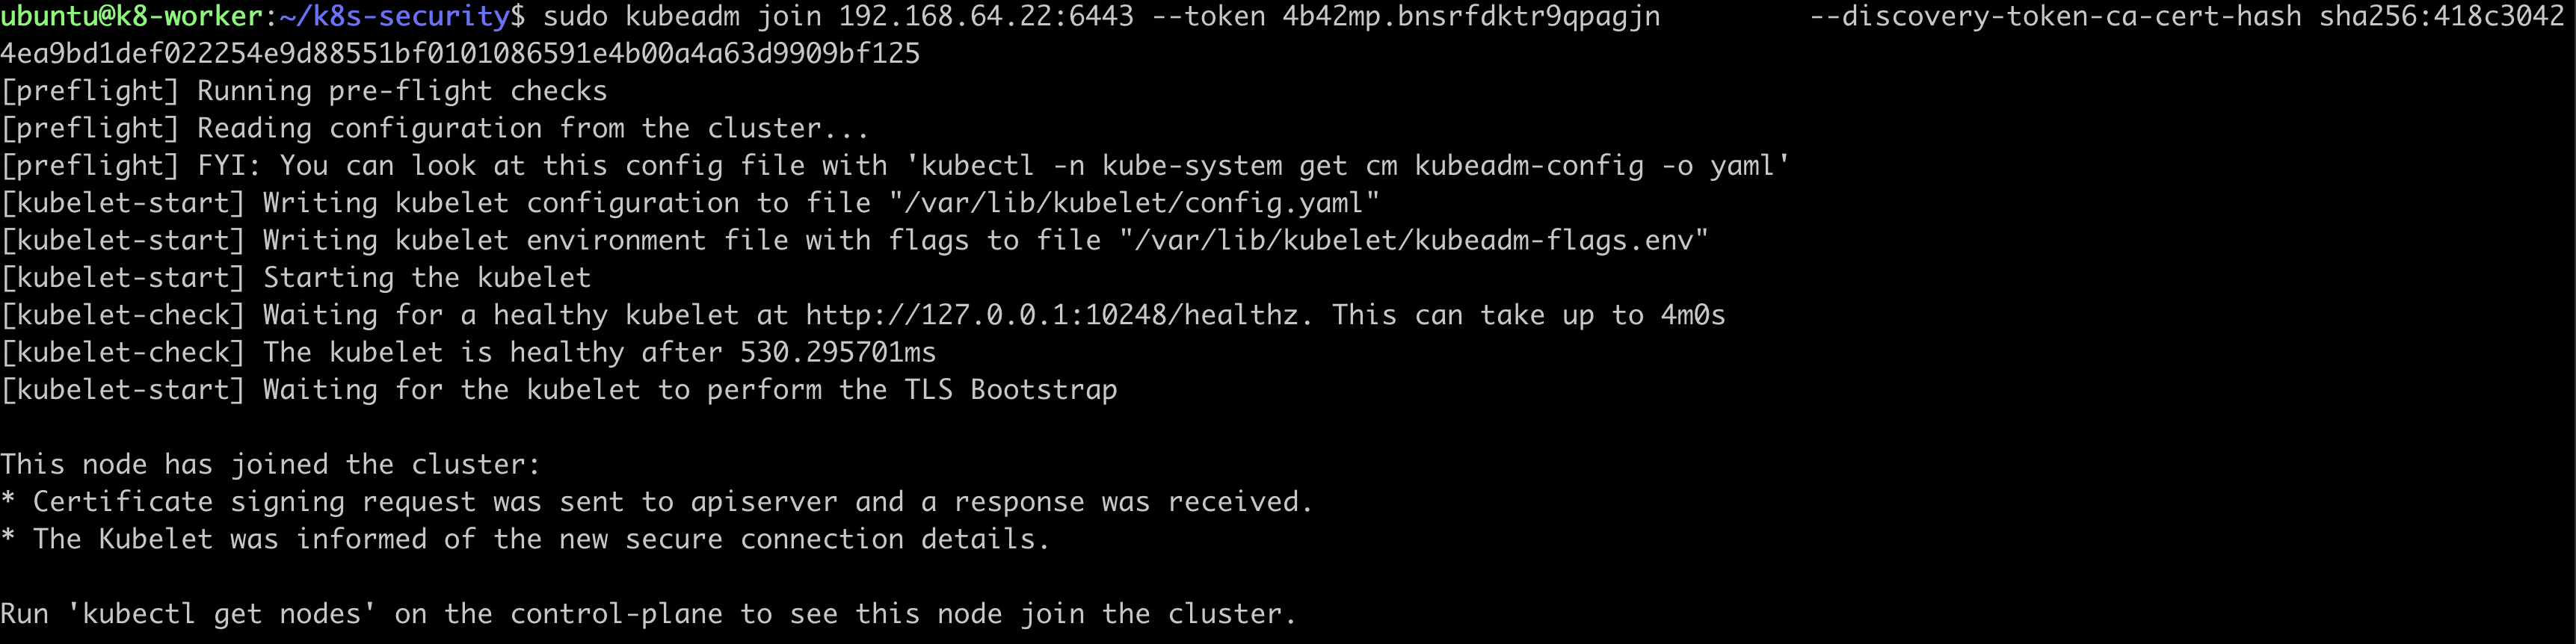
Repeat Steps 5-7 for each of your worker nodes (e.g., worker02).
Step 8: Witnessing the Ensemble: Verifying Your Cluster Back on your control plane VM (or your local machine if you’ve configured kubectl), check the status of your nodes:
1
2
3
4
5
6
7
8
9
10
kubectl get nodes

NAME            STATUS   ROLES           AGE   VERSION
control-plane   Ready    control-plane   83m   v1.30.9
worker01        Ready    <none>          82m   v1.30.9
worker02        Ready    <none>          82m   v1.30.9
worker03        Ready    <none>          81m   v1.30.9
worker04        Ready    <none>          81m   v1.30.9
worker05        Ready    <none>          81m   v1.30.9
worker06        Ready    <none>          81m   v1.30.9
Congratulations! Your multi-node Kubernetes cluster is now humming on your Mac.
Step 9: Bringing Kubernetes Home (Optional) To interact with your cluster from your local Mac terminal without always SSHing into the control plane:
1
2
multipass transfer control-plane:/home/ubuntu/.kube/config ~/.kube/config
export KUBECONFIG=~/.kube/config
Now, kubectl commands run on your local machine will target your newly created cluster.
Beyond the Horizon: Empowering Your Local Kubernetes Your journey doesn’t end here! With your local Kubernetes cluster up and running, a universe of possibilities unfolds:
Gaining Control: Accessing Control Plane Components: Because you’ve set up this cluster yourself, you have direct access to the control plane components running within the control-plane VM. This allows for deeper customization and troubleshooting. You can SSH into the control-plane VM and interact with the kube-apiserver, kube-scheduler, kube-controller-manager, and etcd. This level of access is invaluable for understanding the inner workings of Kubernetes.
Fine-Tuning the Helm: Updating kube-apiserver Settings: Need to adjust API server flags? You can directly modify the kube-apiserver manifest file (usually found in /etc/kubernetes/manifests/) on your control plane node. Remember to be cautious when making changes to core components and always back up configurations. After modifying the manifest, kubelet will automatically restart the kube-apiserver pod.
Fortifying Your Kingdom: Installing Security Tools like Falco: Security is paramount. With your local cluster, you can easily experiment with security tools like Falco. Falco is a powerful runtime security tool that can detect anomalous activity in your containers and Kubernetes environment. You can deploy Falco using Helm or by applying YAML manifests. This allows you to learn how to monitor and secure your Kubernetes workloads effectively.
Embracing the Ecosystem: Exploring Kubernetes Add-ons: Dive into the vast ecosystem of Kubernetes add-ons. Install a network plugin (like Calico or Flannel if not already configured by the k8s.sh script), set up a DNS service (like CoreDNS), deploy a metrics server, or explore ingress controllers to manage external access to your applications.
Local Development Nirvana: Integrating with Development Tools: Connect your local development tools directly to your Kubernetes cluster. Use tools like Skaffold or Tilt to automate the build, push, and deploy cycle for your containerized applications, making local development on Kubernetes a breeze.
Disaster Recovery Drills: Practicing Cluster Operations: Your local cluster is an ideal environment for practicing essential Kubernetes operations like backups and restores (especially for etcd), upgrades, and troubleshooting common issues without risking production environments.
Farewell, For Now: The Beginning of Your Kubernetes Mastery Setting up a local Kubernetes cluster on your Mac is more than just a technical exercise; it’s an empowering journey that deepens your understanding and unlocks new possibilities. Embrace the process, experiment fearlessly, and watch as your Kubernetes skills flourish.
The path to Kubernetes mastery is a continuous adventure. May this guide serve as a cherished first step on your exciting voyage!
Helpful Links:
- https://artifacthub.io/ (Find and install Kubernetes packages with Helm)