RabbitMQ in a Box! Your Whirlwind Docker Adventure!
🐇 RabbitMQ in a Box! Your Whirlwind Docker Adventure! 🐳📦
Hey there, Docker wranglers and message mavens! 👋 Ready to get your hands on some serious RabbitMQ action, all snug inside those neat Docker containers? You’ve come to the right place! This workshop is your express lane to becoming a Dockerized RabbitMQ rockstar. Let’s dive in!
🗺️ First Stop: Cloning the Code Depot!
Before we fire up our Docker engines, let’s grab the workshop blueprints. Open your terminal and punch in these commands:
1
2
git clone https://github.com/cfkubo/rmq-workshop
cd rmq-workshop/docker
🛠️ Building Our Docker Fortress!!
Alright, you’ve got the code! Now, step into the docker directory – that’s where our container playground awaits.
🛠️ LAB 1: Launching RabbitMQ in Dockerland!
Time to spin up our very own RabbitMQ instance using the magic of Docker!
First, let’s create a dedicated network for our RabbitMQ and related containers to chat:
1
docker network create rmq-network
Now, let’s fire up a RabbitMQ container with the management UI enabled. This gives us a web-based control panel – super handy!
1
docker run -d --hostname my-rabbit --name rabbitmq --network rmq-network -p 5672:5672 -p 15672:15672 -p 15692:15692 -p 5552:5552 rabbitmq:4.0-management
Whoa, what’s all that? Let’s break it down:
-d: Runs the container in the background (detached mode).
–hostname my-rabbit: Sets the hostname of the container.
–name rabbitmq: Gives our container a friendly name: rabbitmq.
–network rmq-network: Attaches this container to the rmq-network we created.
-p 5672:5672: Maps the RabbitMQ AMQP port (for messaging).
-p 15672:15672: Maps the RabbitMQ Management UI port (for web access).
-p 15692:15692: Maps the RabbitMQ Prometheus metrics port (for monitoring).
-p 5552:5552: Maps the stream listener port
rabbitmq:4.0-management: The official RabbitMQ Docker image with the management plugin pre-installed.
🛠️Powering Up! Enabling RabbitMQ Plugins
RabbitMQ has some awesome superpowers hidden in plugins. Let’s enable a few useful ones:
1
2
3
4
5
6
7
docker exec rabbitmq rabbitmq-plugins enable rabbitmq_stream
docker exec rabbitmq rabbitmq-plugins enable rabbitmq_stream_management

docker exec rabbitmq rabbitmq-plugins enable rabbitmq_prometheus

docker exec rabbitmq rabbitmq-plugins enable rabbitmq_shovel
docker exec rabbitmq rabbitmq-plugins enable rabbitmq_shovel_management
These commands tell our running rabbitmq container to activate plugins for:
rabbitmq_stream: For working with RabbitMQ Streams (a different kind of messaging).
rabbitmq_stream_management: The UI for managing Streams.
rabbitmq_prometheus: For exposing metrics in a format Prometheus can understand (monitoring!).
rabbitmq_shovel: For moving messages between different RabbitMQ instances or queues.
rabbitmq_shovel_management: The UI for managing Shovels.
🚀Meet Your New Best Friend: RabbitmqAdmin CLI
Want a command-line tool to interact with RabbitMQ? Say hello to rabbitmqadmin!
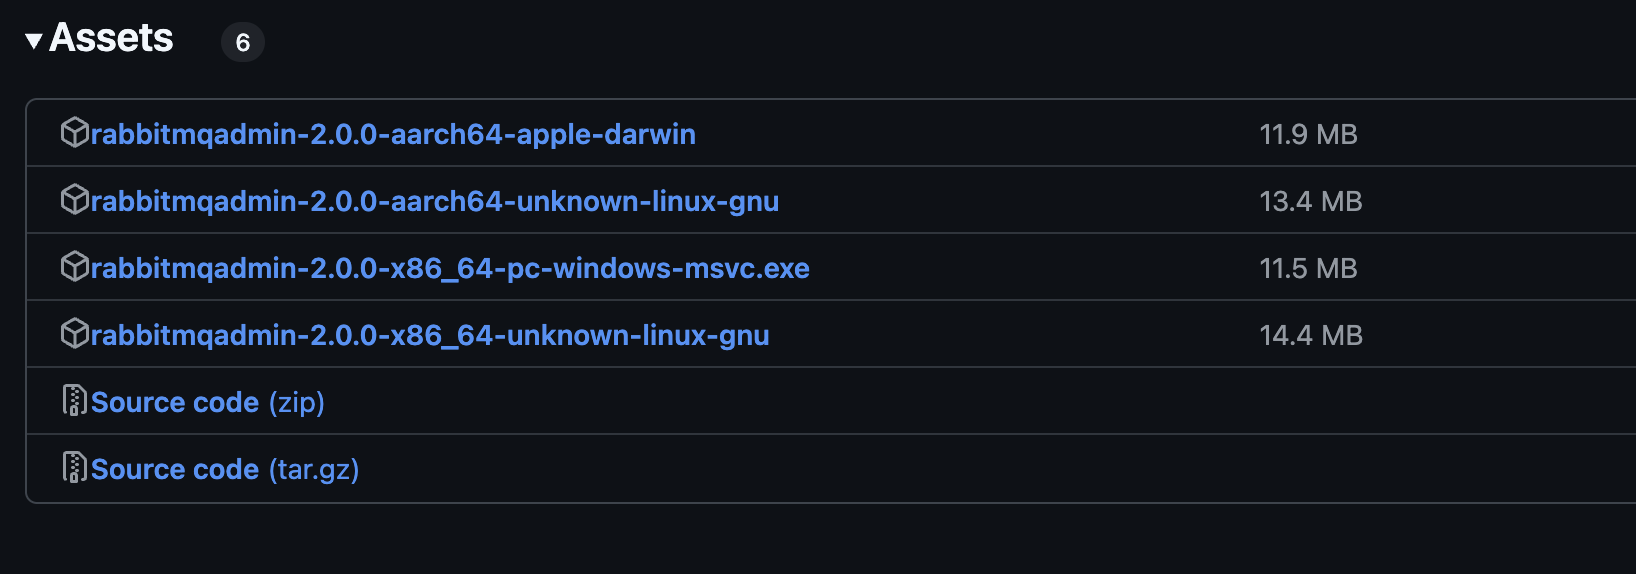
Head over to this link to grab the binary for your operating system:
https://github.com/rabbitmq/rabbitmqadmin-ng/releases
Once downloaded, let’s make it executable and put it where you can easily use it:
1
2
3
4
5
# Assuming you downloaded a file like rabbitmqadmin-2.1.0-your-os
cp rabbitmqadmin-2.1.0-* rmqadmin
chmod +x rmqadmin
sudo mv rmqadmin /usr/local/bin
rmqadmin --help
This sequence renames the downloaded file to rmqadmin, gives it execution permission, moves it to your system’s bin directory (so you can run it from anywhere), and then shows you its help menu to confirm it’s working.
👤🔑 LAB 2: Creating Users and Controlling Access!
Let’s set up a new user with specific permissions to interact with our RabbitMQ server.
1
2
3
docker exec rabbitmq rabbitmqctl add_user arul password
docker exec rabbitmq rabbitmqctl set_permissions  -p / arul ".*" ".*" ".*"
docker exec rabbitmq rabbitmqctl set_user_tags arul administrator
Here’s what’s happening:
rabbitmqctl add_user arul password: Creates a user named arul with the password password. rabbitmqctl set_permissions -p / arul “.” “.” “.”: Grants the user arul full permissions (“.”) to configure, write, and read resources within the default virtual host (-p /). rabbitmqctl set_user_tags arul administrator: Assigns the administrator tag to the arul user, giving them admin privileges.
🚀👁️🗨️ Your RabbitMQ Control Center: The Management UI
Ready for a visual tour? Open your web browser and navigate to:
You’ll be greeted with a login screen. You can use the default credentials:
Username: guest Password: guest
Or, you can log in with the arul user and the password you just created. Explore the UI – you can see queues, exchanges, connections, and much more!
🚦 LAB 3: Putting RabbitMQ to Work with PerfTest!
Let’s simulate some message traffic using the rabbitmq-perf-test tool running as Docker containers.
⚙️ Quorum Queues in Action!
Quorum queues are a more robust and durable type of queue in RabbitMQ. Let’s see them in action:
1
docker run --name perf-tst -d --network rmq-network pivotalrabbitmq/perf-test:latest --uri amqp://guest:guest@rabbitmq:5672 --quorum-queue --producers 10 --consumers 5 --predeclared --routing-key "sa-workshop" --pmessages 10000 --queue "sa-workshop" --rate 100 --consumer-rate 10 --multi-ack-every 10 -c 10
This command spins up a perf-test container that will:
Connect to our rabbitmq container using the rmq-network. Use the guest user credentials. Declare a quorum queue named sa-workshop. Simulate 10 message producers sending a total of 10,000 messages. Simulate 5 message consumers receiving messages. Control the sending and receiving rates.
🌊 Diving into Streams!
Remember those Streams we enabled? Let’s run a performance test using a Stream queue:
1
2

docker run --name perf-tst7 -d --network rmq-network pivotalrabbitmq/perf-test:latest --uri amqp://guest:guest@rabbitmq:5672 --stream-queue --producers 10 --consumers 5 --predeclared --routing-key "sa-workshop-stream" --pmessages 100 --queue "sa-workshop-stream" --rate 100 --consumer-rate 10 --multi-ack-every 1 -c 10
This is similar to the Quorum test, but it uses the –stream-queue flag to create and interact with a RabbitMQ Stream named sa-workshop-stream. Observe the differences in the Management UI!
📊 LAB 4: Keeping an Eye on Things with Monitoring!
Let’s set up Prometheus and Grafana to visualize metrics from our RabbitMQ server.
🔭 Deploying Prometheus on Docker
Prometheus will scrape metrics exposed by RabbitMQ. We’ll need a prometheus.yml configuration file in your current directory (you might need to create one with a RabbitMQ scrape job targeting rabbitmq:15692). Then, run:
1
docker run -d --name prometheus --network rmq-network -p 9090:9090 -v $(pwd)/prometheus.yml:/etc/prometheus/config/prometheus.yml prom/prometheus --config.file=/etc/prometheus/config/prometheus.yml
This command runs the Prometheus container, maps its port 9090, attaches it to our rmq-network, and mounts your prometheus.yml configuration file into the container.
🎨 Deploying Grafana for Beautiful Visualizations!
Grafana will connect to Prometheus and display our RabbitMQ metrics in dashboards:
1
docker run -d --name=grafana -p 3000:3000 --network rmq-network  -e GF_DATASOURCE_DEFAULT_URL=http://prometheus:9090 -e GF_SECURITY_ADMIN_PASSWORD="password" grafana/grafana
This runs the Grafana container, maps its port 3000, attaches it to the rmq-network, and sets the default data source URL to our Prometheus container (http://prometheus:9090). It also sets an initial admin password.
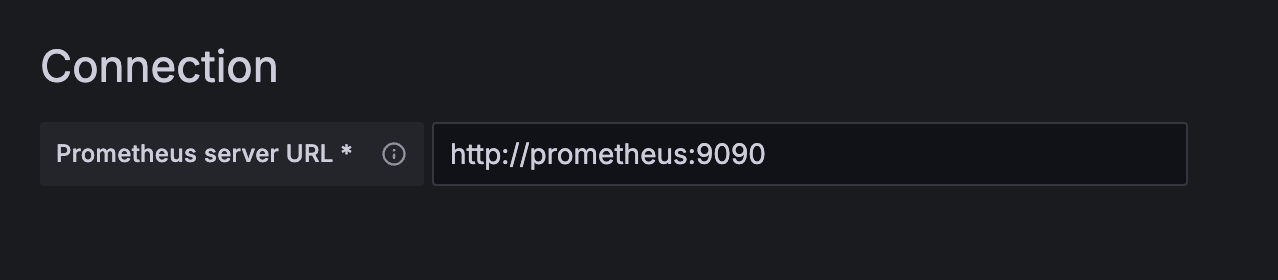
🔗 Adding Prometheus as a Data Source to Grafana
Open your browser and go to http://localhost:3000. Log in (default username is admin, password is password as we set in the docker run command).
Click on “Add your first data source”. Select “Prometheus”. In the “URL” field, enter http://prometheus:9090. Click “Save & test”. You should see a “Data source is working” message!
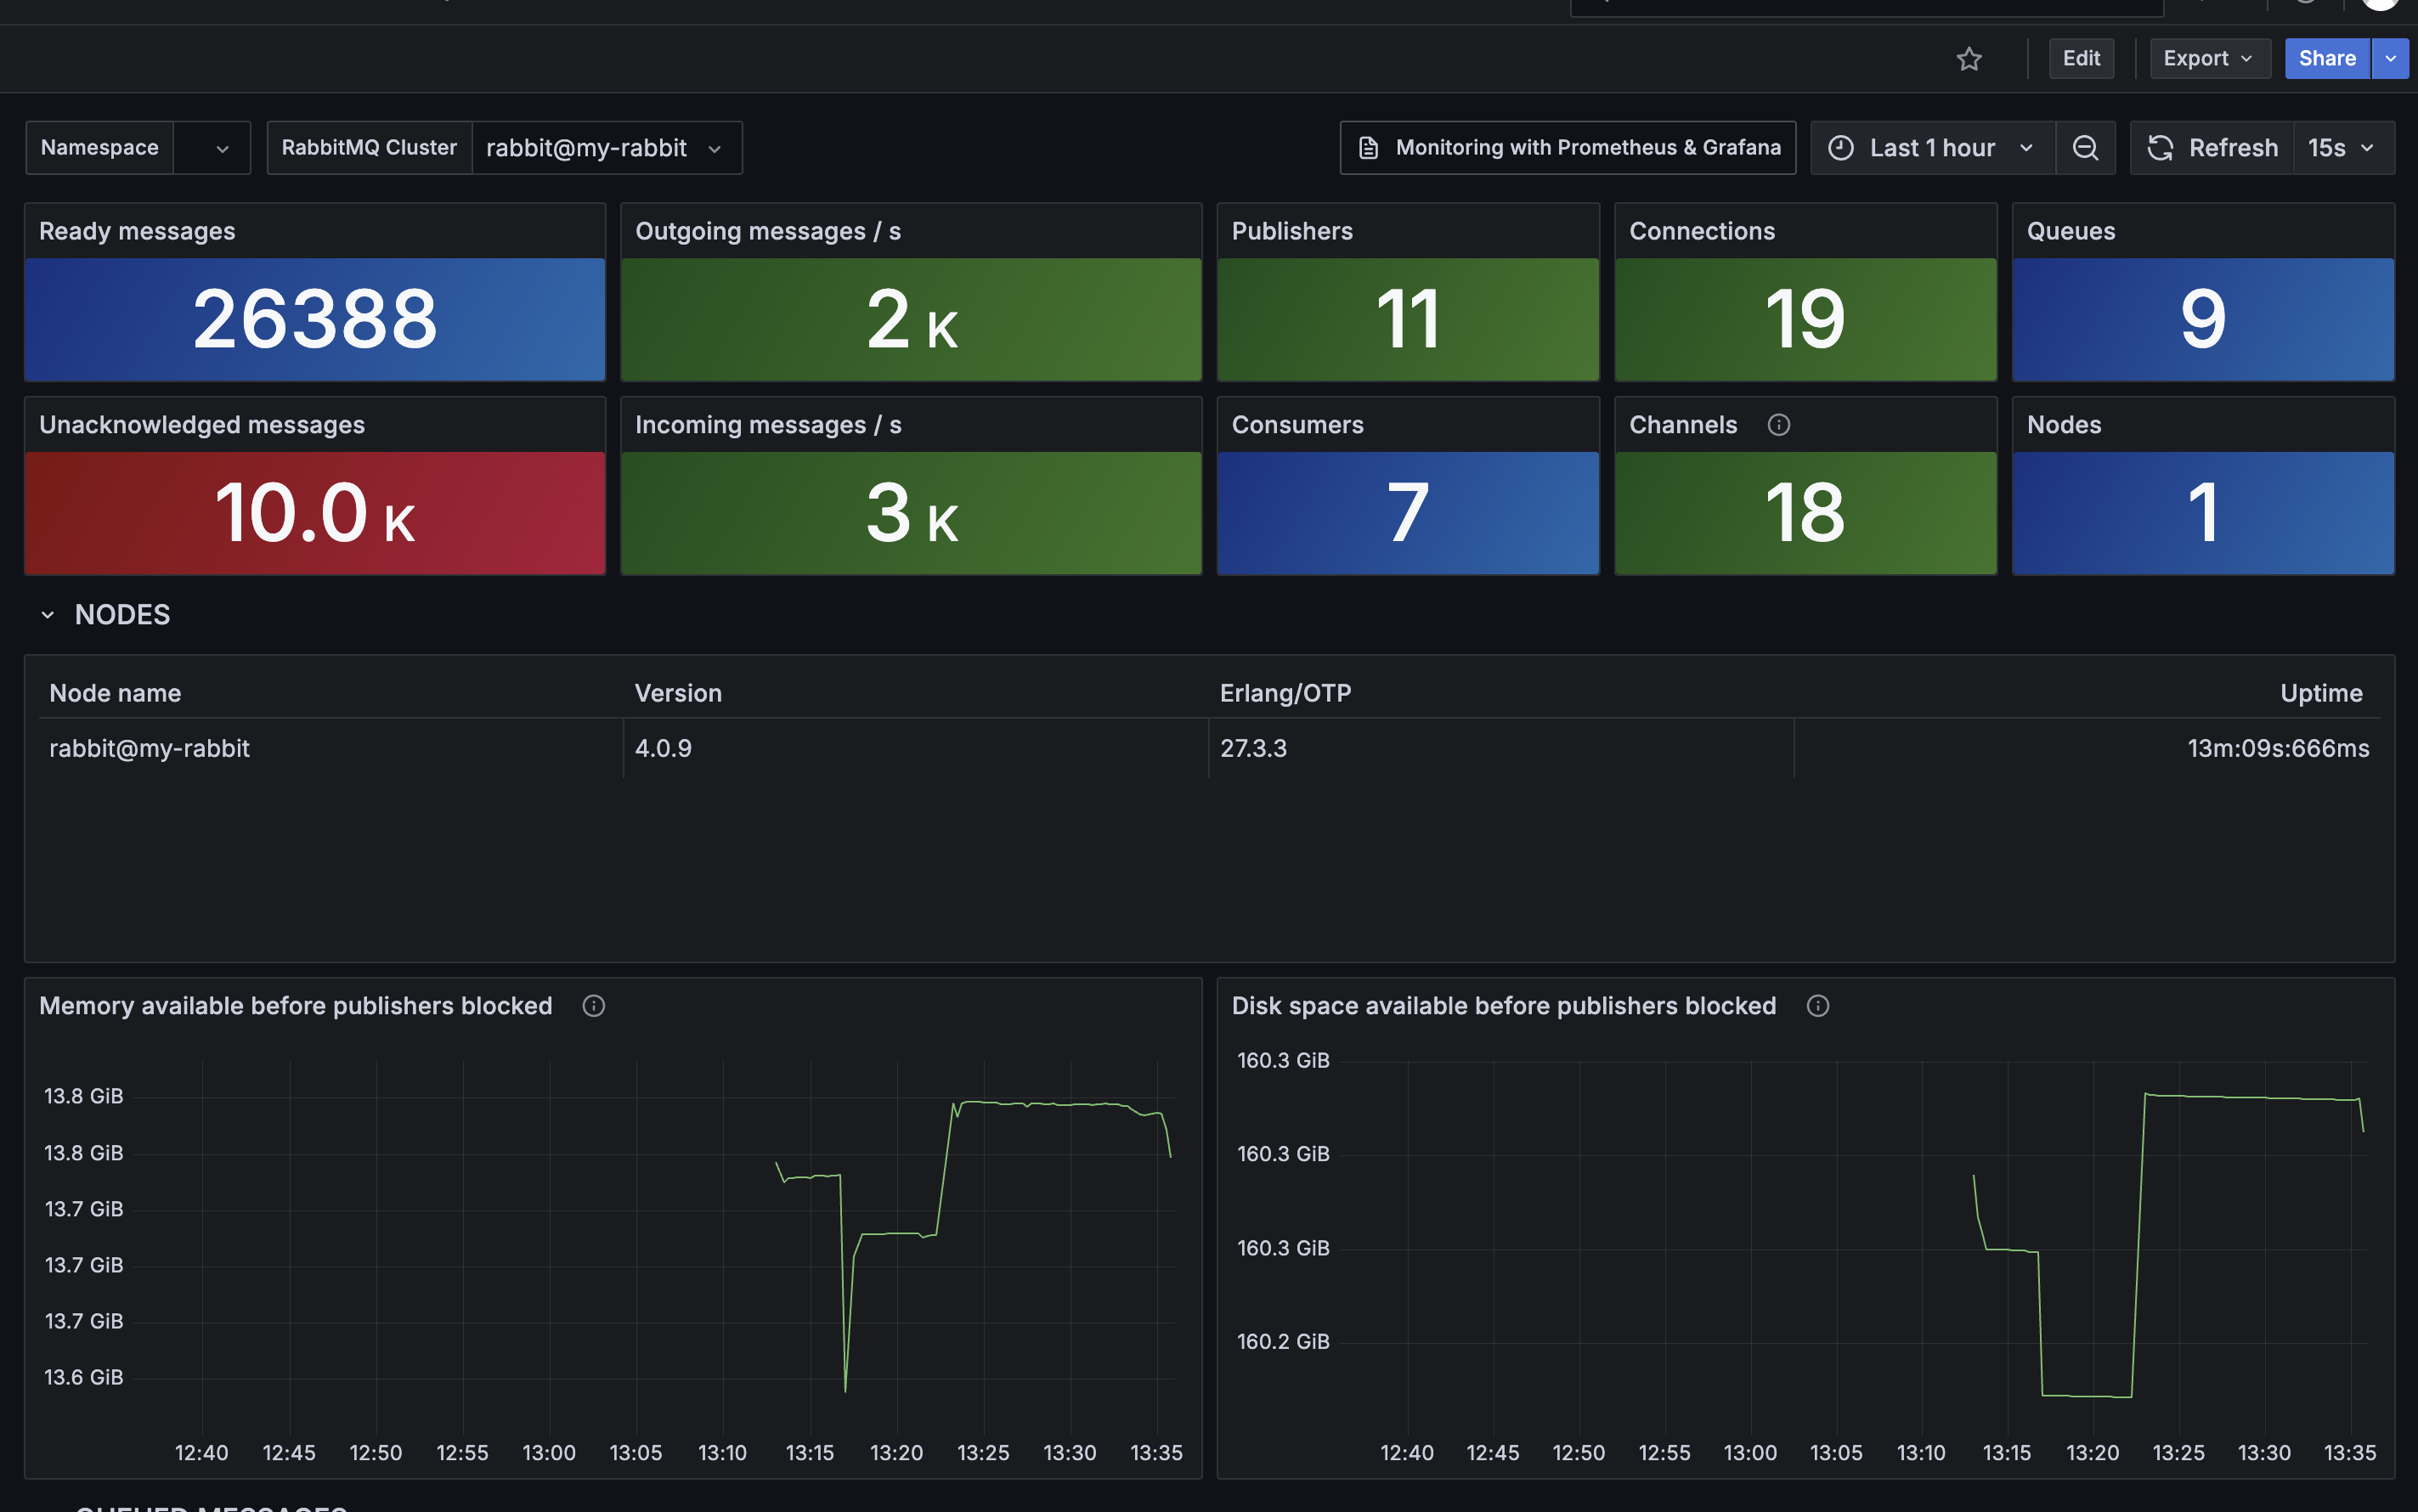
📈 Importing a RabbitMQ Overview Dashboard
Let’s get some pre-built RabbitMQ dashboards! You’ll likely have a rmq-overview.json file in the workshop repo.
Click on the “+” icon in the Grafana sidebar and select “Import”. Choose “Import via JSON”. Open the rmq-overview.json file, copy its entire contents, and paste it into the JSON field in Grafana. Click “Load”. In the “Prometheus” dropdown, select the Prometheus data source you just added. Click “Import”. Voila! You should now see a Grafana dashboard displaying key metrics from your RabbitMQ server.
🚚 LAB 5: Shovelling Messages Around!
Remember the Shovel plugin? Let’s use it to move messages between queues:
1
docker exec rabbitmq rabbitmqctl set_parameter shovel my-shovel '{"src-protocol": "amqp091", "src-uri": "amqp://guest:guest@rabbitmq", "src-queue": "sa-workshop", "dest-protocol": "amqp091", "dest-uri": "amqp://guest:guest@rabbitmq", "dest-queue": "sa-workshop-shovelq", "dest-queue-args": {"x-queue-type": "quorum"}}'
This command creates a Shovel named my-shovel that will move messages from the sa-workshop queue to a new quorum queue named sa-workshop-shovelq on the same RabbitMQ instance. Observe the message movement in the Management UI!
🌱 LAB 6: Spring Boot Producer Power!
Let’s fire up a simple Spring Boot application that will produce messages to our RabbitMQ queue.
1
2
3
git clone [https://github.com/cfkubo/spring-boot-random-data-generator](https://github.com/cfkubo/spring-boot-random-data-generator)
cd spring-boot-random-data-generator
mvn spring-boot:run
This will clone a basic Spring Boot producer application and run it. By default, it’s likely configured to send messages to a RabbitMQ instance on localhost. Since we have our RabbitMQ running on the rmq-network and accessible via the rabbitmq hostname, you might need to adjust the Spring Boot application’s configuration (e.g., in application.properties or application.yml) to point to rabbitmq:5672.
🛠️ LAB 7: Mastering RabbitmqAdmin CLI!
Let’s explore some more rabbitmqadmin commands:
📢 Declaring Queues
1
2
rmqadmin declare queue --name demo
rmqadmin declare queue --name demoQrorum --type quorum
These commands use rmqadmin to declare a standard queue named demo and a quorum queue named demoQrorum.
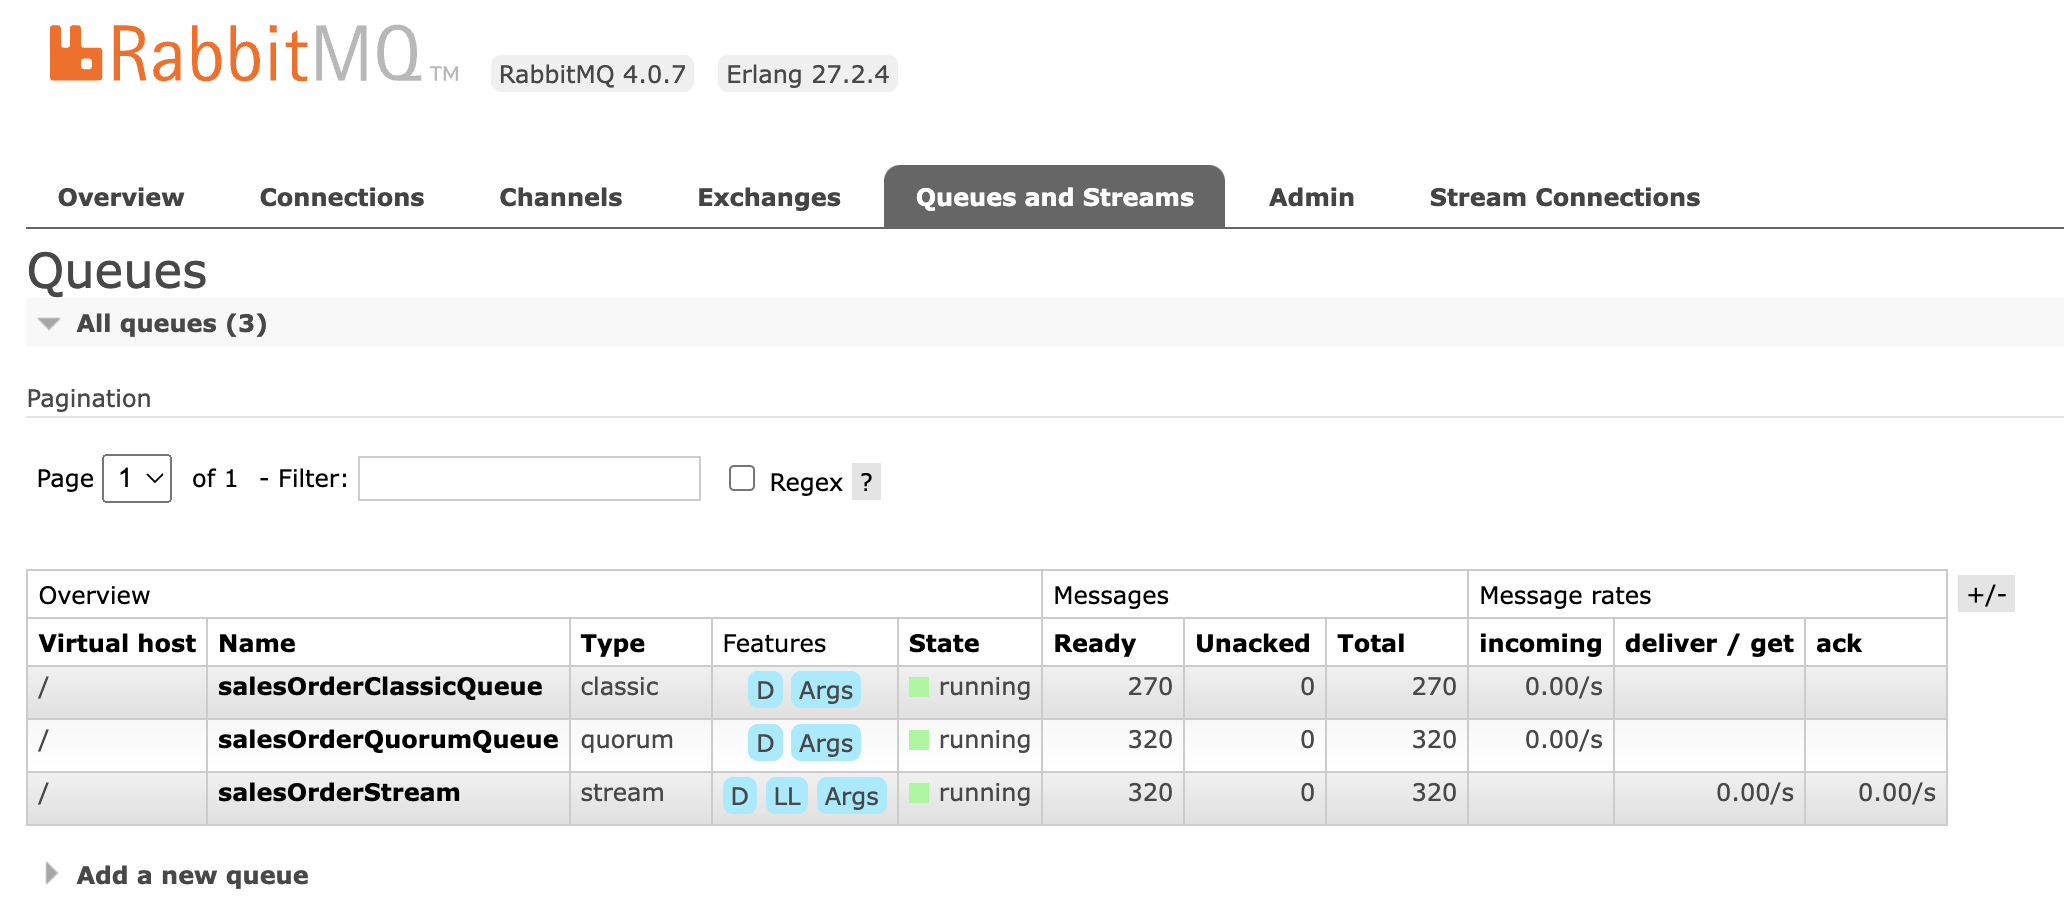
📜 Listing Queues
1
rmqadmin list queues
This command will display a list of all the queues in your RabbitMQ instance.
📊 Showing Memory Breakdown
1
rmqadmin show memory_breakdown_in_percent  --node rabbit@my-rabbit
This command provides a breakdown of the memory usage on the specified RabbitMQ node (rabbit@my-rabbit).
🎉 You’ve Conquered Dockerized RabbitMQ! 🎉
Give yourself a pat on the back! You’ve successfully navigated the world of RabbitMQ within Docker containers. You’ve launched RabbitMQ, explored its features, sent messages, monitored its performance, and even used the command-line admin tool.
Keep experimenting and building awesome things with RabbitMQ and Docker! The containerized messaging universe is yours to explore! 🚀🐰🐳